Key Takeaways
- Repotting rubber plant may help encourage new growth as their root systems expand. It’s recommended to repot rubber plants every 2-3 years.
- Signs it’s time to repot include roots growing out of the drainage holes, slowing growth, and the plant becoming top heavy or unstable in its pot.
- Repot in early spring before growing season. Use a pot 2-4 inches larger than the current pot, with drainage holes.
- Remove the plant from its pot and loosen the root ball. Place in new pot with fresh, well-draining soil. Leave 1-2 inches between the root ball and edges of the new pot.
- Water well after repotting and allow the plant to recover from transplant shock. Avoid fertilizing right after repotting.
- Repotting prevents issues like crowded roots, root rot from soggy soil, and nutrients being depleted from the soil.
- Properly repotting rubber plants encourages healthy growth and prevents common problems. Doing it every few years ensures your plant thrives.
Importance of Repotting Your Rubber Tree
Benefits of repotting
As a plant enthusiast, I understand the importance of giving my rubber plant the space it needs to grow and thrive. Repotting plays a crucial role in ensuring the health and vitality of your rubber plant. Here are a few benefits of repotting:
- More room for roots: As your rubber plant grows, its roots need more space to spread out and absorb nutrients. Repotting allows the roots to have ample room to grow, promoting overall plant health.
- Improved drainage: Over time, the soil in your rubber plant’s pot can become compacted, leading to poor drainage. By repotting your plant, you can refresh the soil, ensuring proper drainage and preventing root rot.
- Nutrient replenishment: The soil in your rubber plant’s current pot may become depleted of nutrients over time. Repotting provides an opportunity to add fresh, nutrient-rich soil, giving your plant the nourishment it needs to thrive.
Signs that your rubber plant needs a bigger pot
- Roots poking out: If you notice roots poking out from the drainage holes of your rubber plant’s pot, it’s a clear sign that the roots have outgrown the current pot. Repotting becomes necessary to give the roots more space to grow.
- Stunted growth: A rubber plant that has stopped growing or showing signs of slow growth may indicate that it’s time for a larger pot. Limited space in the current pot can restrict the plant’s ability to develop and expand.
- Watering issues: If you find that you need to water your rubber plant more frequently than usual, it could be a sign that the roots have outgrown the pot’s capacity. Repotting can help prevent waterlogging and ensure proper water absorption.
Remember, repotting your rubber plant should be done during periods of active growth, typically in spring or early summer. When repotting, choose a pot that is one to two sizes larger than the current one and use a well-draining soil mix. With a little bit of care and attention, your rubber plant will thrive in its new home!
When to Repot a Rubber Plant
As a proud plant parent, it’s essential to keep an eye on your rubber plant’s growth and ensure it has a suitable home. Knowing when to repot your rubber plant is crucial for its overall health and well-being. Here are a couple of signs that indicate your plant needs a bigger pot.
Frequency of repotting based on plant growth
Rubber plants are known for their rapid growth, especially in the right conditions. As they grow, their roots expand and require more space to continue thriving. Generally, it is recommended to repot your rubber plant every 1-2 years, depending on its growth rate. If you notice vigorous growth or overcrowded roots, it’s probably time to give your plant a new and larger home.
Identifying when the roots are showing
Another clear indication that your rubber plant needs repotting is when the roots start to emerge from the drainage holes or grow out of the soil surface. This means that the current pot can no longer accommodate the expanding root system. If you gently lift the plant from its current pot and notice a dense and tangled root ball, it’s a sure sign that your rubber plant is ready for an upgrade.
Remember, repotting should be done with care to avoid damaging the plant’s roots. Choose a pot that provides ample space for growth and has proper drainage to prevent waterlogged roots.
In conclusion, paying attention to the growth and root development of your rubber plant is key to determining when it needs to be repotted. By providing it with a larger pot when necessary, you’re ensuring that your rubber plant has the space it needs to flourish and continue bringing beauty to your space. Happy repotting!
How to Repot a Rubber Tree Plant
Choosing the right pot size
If you notice that your rubber plant’s roots are growing out of the drainage holes, or the plant is becoming root-bound, it’s time to repot it into a larger pot. Choosing the right pot size is crucial for the plant’s health and growth.
Here are a few tips to help you select the appropriate pot size:
- Consider the current size of the plant: The new pot should be one or two sizes larger than the current one.
- Provide room for growth: Rubber plants have a tendency to grow quickly and develop an extensive root system. Choose a pot that allows the roots to spread and grow freely.
- Ensure proper drainage: The new pot should have drainage holes to prevent water from accumulating and causing root rot.
- Avoid too much extra space: While it’s essential to provide room for growth, avoid choosing a pot that is excessively large. Too much space can lead to overwatering and potentially harm the plant.
Step-by-step guide for repotting a rubber plant
Once you have selected the right pot size, follow these steps to repot your rubber plant:
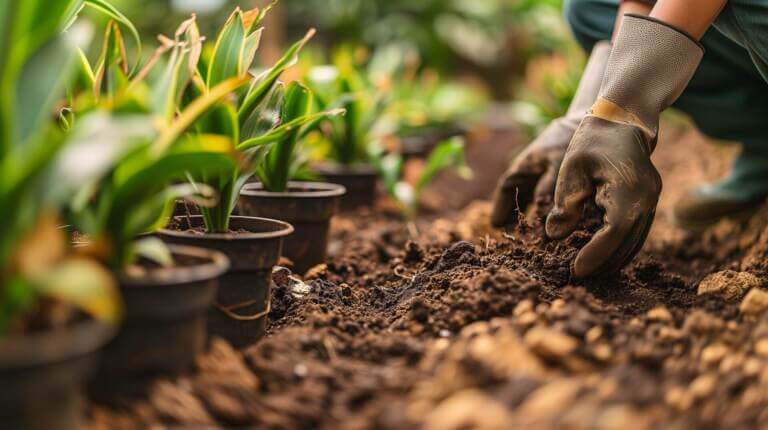
- Prepare the new pot: Fill the new pot with well-draining potting soil about one-third of the way up.
- Remove the plant from the old pot: Gently loosen the plant’s roots by tapping the sides of the old pot. Carefully lift the plant out, supporting the base of the stem to avoid damaging it.
- Inspect the roots: Check the roots for any signs of disease or rot. If you notice any damaged or dead roots, trim them with clean scissors or pruning shears.
- Place the plant in the new pot: Position the plant in the center of the new pot and fill the remaining space with potting soil, making sure not to bury the stem too deeply.
- Water the plant: Give your newly repotted rubber plant a thorough watering, allowing the excess water to drain out from the bottom of the pot.
- Provide proper care: After repotting, place the rubber plant in a well-lit area away from direct sunlight. Regularly monitor the soil moisture and water accordingly.
Remember, repotting your rubber plant can provide it with the necessary space to thrive and continue growing beautifully. By choosing the right pot size and following the proper repotting steps, you can ensure the health and longevity of your rubber plant.
Tips for Successful Repotting Rubber Plant Tree
Ensuring proper drainage and soil mixture
When it comes to repotting your beloved rubber plant, there are a few signs to look out for that indicate your plant is ready for a bigger home. First and foremost, check for crowded roots. If you see roots circling around the inside of the pot, it’s time to repot.
To ensure successful repotting, proper drainage is crucial. Choose a pot with drainage holes and use a well-draining soil mixture. A blend of potting soil, perlite, and peat moss can provide the ideal conditions for your rubber plant to thrive. This allows excess water to flow out of the pot and prevents the roots from becoming waterlogged, which can lead to root rot.
Caring for the plant after repotting
Once your rubber plant is happily settled into its new pot, it’s important to continue providing the care it needs to flourish. Keep the soil moist, but not soggy, by watering when the top inch of soil feels dry. Avoid overwatering as this can drown the roots and cause unnecessary stress to the plant.
Place your rubber plant in a well-lit area, but away from direct sunlight. Rubber plants thrive in bright, indirect light. If the plant begins to show signs of yellowing or browning leaves, it may be receiving too much direct sunlight. Conversely, if the leaves start to droop or become pale, it may not be receiving enough light. Adjust the positioning accordingly to ensure your rubber plant gets the optimal amount of light.
Finally, regular fertilization is essential for the long-term health of your rubber plant. Feed it with a balanced, water-soluble fertilizer every two to four weeks during the growing season. This will provide the necessary nutrients to keep your plant vibrant and lush.
Remember, repotting your rubber plant is a simple yet crucial step in its care routine. By ensuring proper drainage, providing the right soil mixture, and continuing to give it the care it needs, your rubber plant will thrive in its new pot and bring beauty and greenery to your space for years to come.
FAQ
When should I repot rubber tree plants?
You should repot rubber tree plant when it shows signs of needing a bigger pot where it runs out of space for the root to grow.
What are the signs that my rubber plant needs a bigger pot?
Signs that your rubber plant needs a bigger pot include the roots coming out of the drainage holes, the plant becoming too top-heavy, and the roots being tightly packed in the current pot, also known as root-bound.
How often should you repot your rubber plant?
Rubber plants generally need to be repotted every 1-2 years.
What type of pot should I use when repotting my rubber plant?
When repotting your rubber plant, it is best to choose a pot that is 1-2 inches larger in diameter than the current pot and has drainage holes.
What type of potting soil should I use for my rubber plant?
You can use a well-draining potting mix for your rubber plant, preferably one that is specifically formulated for houseplants.
How should I transplant my rubber plant to a new pot?
To transplant your rubber plant to a new pot, gently remove the plant from its current pot, loosen the roots, place it in the new pot about two inches larger than the root ball, and fill the pot with fresh new soil.
When is the best time to repot my rubber plant?
The best time to repot your rubber plant is in the spring to early summer, when the plant is actively growing.
How much soil should I use when repotting my rubber plant?
You should use enough soil to fill the pot around the root ball, leaving about an inch of space at the top for watering.
How should I water my rubber plant after repotting?
After repotting your rubber plant, water it thoroughly until water drains out of the bottom of the pot, and then allow the top inch of soil to dry before watering again.
What should I do if my rubber plant is not growing after repotting?
If your rubber plant isn’t growing after repotting, make sure it is receiving adequate light, water, and nutrients. If the plant isn’t showing any signs of growth for an extended period of time, consider repotting it again.


