How To Care For a Rubber Plant, a Complete Indoor Ficus Elastica Houseplant Guide
I absolutely love having indoor plants, and one of my favorites is the rubber fig, also known as the rubber plant. You might discover this remarkable plant identified as either a Rubber Fig or Rubber Tree.
In case you are wondering the “Rubber” name arises from the white milky sap that exudes from the leaves and stems when it is scratched or cut. It’s beautiful and adds a touch of nature to my home.
If you’re thinking of getting a rubber plant or already have one and want to ensure it thrives, you’ve come to the right place. In this guide, I’ll share some valuable tips on how to care for a rubber plant indoors.
Benefits of having a rubber plant indoors
Rubber plants offer numerous benefits, making them a popular indoor gardening choice. Here are a few reasons why having a rubber plant indoors is a great idea:
- Purify the air: Rubber plants have large leaves that can help remove harmful pollutants from the air, improving the overall air quality in your home.
- Add greenery: Indoor plants bring a sense of calmness and tranquility to any space, and rubber plants are no exception. The lush green foliage offers a natural aesthetic that enhances the ambiance of your home.
- Easy to care for: Rubber plants are relatively low-maintenance, making them suitable for both beginner and experienced gardeners. With the right care, they can thrive and grow for many years.
Importance of proper rubber plant care and maintenance
To ensure your rubber plant remains healthy and vibrant, it’s crucial to provide it with proper care and maintenance. Here are a few key steps to keep in mind:
- Lighting: Rubber plants prefer bright, indirect light. Place your plant near a window with filtered sunlight to avoid direct exposure, as it can scorch the leaves.
- Watering: Water your rubber plant when the top inch of the soil feels dry. Overwatering can lead to root rot, so it’s essential to allow the soil to dry out between waterings.
- Humidity: Rubber plants thrive in moderate to high humidity. To increase humidity levels, you can place a tray of water near the plant or use a humidifier.
- Pruning: Regular pruning helps maintain the shape and size of your rubber plant. Remove any yellowing or damaged leaves to promote new growth.
Remember, every plant is unique, and it may require slightly different care. Pay attention to the specific needs of your rubber plant by observing its growth and adjusting your care routine accordingly.
With these care tips, your rubber plant will flourish and become a beautiful addition to your indoor space. Happy gardening!
Choosing the Right Spot
When it comes to caring for a rubber plant indoors, finding the perfect spot is essential. Here are a few key factors to consider:
Ideal lighting conditions for rubber plants
Rubber plants thrive in bright, indirect light. Placing your plant near a north or east-facing window is ideal as it provides the right amount of light without direct sun exposure. However, if you don’t have access to these windows, you can always use sheer curtains or blinds to filter the light.
It’s important to note that too much direct sunlight can scorch the leaves and cause damage. On the other hand, if the plant doesn’t receive enough light, its growth may slow down or become leggy. If you notice the leaves turning pale or yellow, it’s a sign that the plant needs more light.
Temperature and humidity requirements
Rubber plants prefer temperatures between 60-75°F (15-24°C). Keep them away from drafts or extreme temperature changes, as they can negatively affect the plant’s health.
In terms of humidity, rubber plants enjoy higher levels. Dry air can cause brown tips on the leaves or even lead to spider mite infestations. You can increase humidity levels by using a humidifier, placing a tray filled with water near the plant, or misting the leaves with water regularly.
Additionally, avoid placing your rubber plant near heating or cooling vents, as the constant air blowing can dry out the plant.
Remember to regularly check the soil moisture level and water your rubber plant when the top inch of soil feels dry. Overwatering can lead to root rot, while underwatering can cause the leaves to wilt and drop.
By creating the right environment with adequate light, temperature, and humidity, you’ll provide the best care for your rubber plant, allowing it to thrive and beautify your indoor space. Happy rubber plant parenting!
Here’s a brief summary of the key points:
- Choose a spot for your rubber plant that provides bright, indirect light.
- Avoid direct sunlight and use sheer curtains or blinds if necessary.
- Maintain a temperature range of 60-75°F (15-24°C) and avoid drafty areas.
- Increase humidity levels through the use of a humidifier, tray of water, or regular misting.
- Avoid placing your plant near heating or cooling vents to prevent drying.
- Water your rubber plant when the top inch of soil feels dry, avoiding overwatering or underwatering.
Watering and Fertilizing
Watering frequency and techniques
As someone who loves indoor plants, taking care of my rubber plant is one of my top priorities. When it comes to watering, the key is finding the right balance. Overwatering can lead to root rot, while under-watering can cause the leaves to droop and eventually fall off. Here are a few tips to help you water your rubber plant effectively:
- Check the soil moisture: Stick your finger about an inch into the soil. If it feels dry, it’s time to water. If it’s still moist, wait a few more days and check again.
- Water thoroughly, but don’t let it sit in water: When watering, make sure to water the plant until the water drains out of the bottom of the pot. However, avoid letting the plant sit in a saucer filled with excess water as it can lead to root rot.
- Adjust watering frequency based on environmental conditions: During warmer months or if your rubber plant is placed in a location with high humidity, it may require more frequent watering. In colder months or drier environments, you may need to reduce watering.
Choosing the right fertilizer and feeding schedule
Feeding your rubber plant with the right nutrients is crucial for its growth and overall health. Here are some key points to keep in mind:
- Use a balanced fertilizer: Look for a well-balanced, water-soluble fertilizer with equal proportions of nitrogen, phosphorus, and potassium. This will provide your rubber plant with the essential nutrients it needs.
- Follow the feeding schedule: Fertilize your rubber plant during the active growing season, typically from spring to early fall. Follow the instructions on the fertilizer packaging for the correct dosage and frequency.
- Avoid over-fertilizing: Over-fertilizing can lead to salt build-up in the soil, which can harm the roots. Always dilute the fertilizer as directed and avoid applying more than recommended.
Remember, every rubber plant is unique, and its needs may vary depending on factors like the size of the plant, pot size, and environmental conditions. Observing your plant closely and making adjustments accordingly will help you provide the best care for your rubber plant indoors.
Repotting and Pruning
Signs for repotting rubber plants
Hello fellow plant lovers! If you’ve got a rubber plant and you’ve noticed it’s not thriving as much as it used to, it might be time to consider repotting. Here are a few signs that indicate your rubber plant needs a new home:
- Roots poking out of drainage holes: If you see roots coming out of the drainage holes at the bottom of the pot, it’s a clear indication that your rubber plant has outgrown its current container.
- Stunted growth: If your rubber plant is no longer growing as vigorously as it used to, it could be an indication that it’s running out of space in its current pot.
- Dry soil that doesn’t retain water: Over time, the soil in your rubber plant’s pot can become compacted, making it difficult for water to penetrate and be absorbed by the roots. If you find that the soil is consistently dry and doesn’t retain water, it’s a sign that repotting is necessary. Be sure to use fresh potting mix or potting soil with good drainage.
Tips for successful pruning and shaping
Now that you understand when to repot your rubber plant, let’s talk about pruning and shaping. Pruning is an essential part of caring for your rubber plant and helps maintain its shape and health. Here are some tips to ensure successful pruning:
- Use clean, sharp tools: Before you start pruning, make sure your tools are clean and sharp. This helps prevent the spread of diseases and ensures a clean cut.
- Remove dead or yellowing leaves: Regularly inspect your rubber plant for dead or yellowing leaves and remove them by making a clean cut at the base of the leaf stem. This promotes healthy growth and prevents the spread of diseases.
- Shape your rubber plant: If you want your rubber plant to have a certain shape or size, pruning is the way to go. Trim back any wayward branches or stems to achieve the desired shape.
Remember, while pruning is beneficial, it’s important not to overdo it. Only prune what is necessary to maintain the health and appearance of your rubber plant.
I hope these tips help you in caring for your rubber plant indoors. With the right amount of repotting and pruning, your rubber plant will thrive and be a beautiful addition to your growing indoor rubber plant collection. Happy gardening!
Dealing with Common Issues
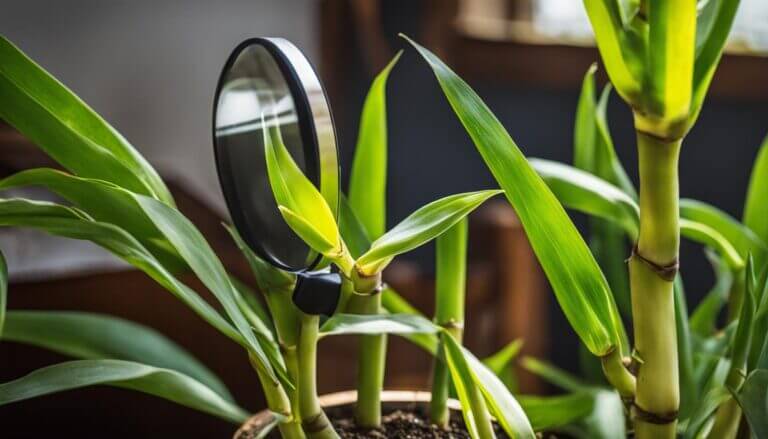
Identifying and treating pests and diseases
Caring for a rubber plant is generally low maintenance, but like all houseplants, they can encounter pests and diseases. The key is to catch and treat these issues early to prevent them from causing significant damage to your plant. Here are some common problems to look out for:
- Pests: Keep an eye out for common houseplant pests such as aphids, mealybugs, and spider mites. If you spot any of these pests, you can use insecticidal soap or neem oil to eliminate them. Be sure to thoroughly coat both the tops and undersides of the leaves.
- Diseases: Rubber plants can sometimes be susceptible to fungal diseases such as root rot or leaf spot. To avoid these issues, make sure to provide proper drainage for your plant and avoid overwatering. If you notice any signs of disease, such as black spots or wilting leaves, remove the affected leaves and treat with a fungicide.
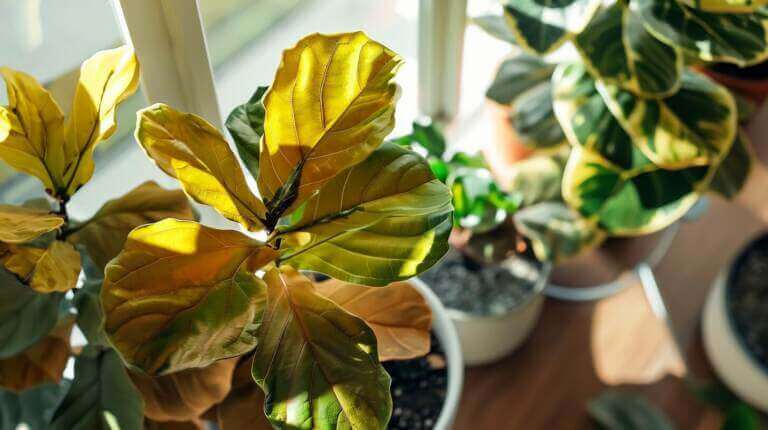
Troubleshooting common problems like yellowing leaves or drooping stems
Sometimes rubber plants can experience common problems that may affect their health and appearance. Here are a few issues you might encounter and how to address them:
- Yellowing Leaves: Yellow leaves can indicate overwatering, underwatering, or nutrient deficiencies. Adjust your watering schedule accordingly and ensure your plant is getting adequate light and nutrients. Trim any yellow leaves to encourage healthy growth.
- Drooping Stems: If your rubber plant’s stems are drooping, it could be a sign of underwatering or excessive direct sunlight. Make sure to water your plant when the top inch of soil feels dry, and ensure it is placed in bright indirect light to prevent wilting.
Remember, consistent care and attention are crucial for maintaining a healthy rubber plant. Regularly check your rubber plant’s leaves for signs of pests, diseases, and other issues, and address them promptly. With proper care, your rubber plant growing indoors can thrive and bring beauty to your living space.
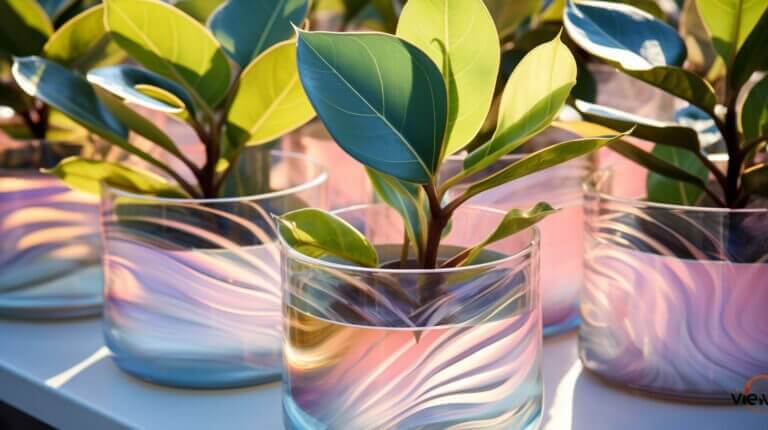
Rubber Tree Plant Propagation Techniques
Step-by-step guide to propagating rubber plants
If you’re looking to expand your rubber plant family or share the love by giving away plant babies, propagating your rubber plant is a great option.
Here’s a step-by-step guide to help you do it successfully.
- Prepare your materials: You’ll need a sharp, clean pair of pruning shears, a clean container with drainage holes, a well-draining soil mix, rooting hormone (optional), and water.
- Choose a healthy stem: Look for a healthy stem that is several inches long and has at least two sets of leaves. Make sure it’s free from pests or diseases.
- Take the stem cutting: Use your pruning shears to make a clean cut just above a leaf node. Aim for a diagonal cut to maximize surface area for root development.
- Remove lower leaves: Remove the lower leaves from the cutting, leaving only a few sets at the top. This will reduce water loss and encourage root growth.
- Optional: Apply rooting hormone: If you have rooting hormone, dip the cut end of the stem into it before planting. This can help stimulate root growth.
- Plant the cutting: Insert the cutting into the prepared container, burying the cut end about an inch deep into the soil mix. Gently firm the soil around the cutting to provide stability.
- Water thoroughly: Give the cutting a good soak, making sure the soil is evenly moist. Avoid overwatering, as it can lead to root rot.
- Provide the right conditions: Place the container in a warm, bright spot with indirect sunlight. Maintain a temperature between 65-85°F (18-29°C) and keep humidity levels high.
- Be patient: It can take several weeks to several months for roots to develop. Check the soil moisture regularly and water as needed to keep it consistently moist but not waterlogged.
Different methods such as stem cuttings or air layering
In addition to stem cuttings, you can also propagate rubber plants through air layering. This method involves creating a new plant by encouraging roots to grow from a section of the parent plant while it’s still attached.
To air layer a rubber plant:
- Select a healthy, flexible stem that is about pencil thickness.
- Make a small notch or remove a small section of the outer layer of the stem, creating a wound.
- Apply a rooting hormone to the wounded area.
- Wrap the area with moist sphagnum moss, then cover it with plastic wrap to create a humid environment.
- Secure the moss and plastic wrap in place with twine or rubber bands.
- Check the moss regularly to ensure it stays moist, misting it with water if needed.
- After a few weeks to a few months, roots will start to appear. Once they are well-developed, carefully cut the stem below the root ball and pot it up in a separate container.
Whichever method you choose, propagating your rubber plant can be a rewarding experience. Enjoy watching your new plants grow and thrive!
Styling and Displaying
Hey there! If you’re a proud owner of a rubber plant and want to know how to care for it and make it look fabulous in your home, you’ve come to the right place. Here are some creative ideas for showcasing your rubber plant and how to pair it with other houseplants for a beautiful indoor garden.
Creative ideas for showcasing your rubber plant
- Statement Plant: The rubber plant is known for its large, glossy leaves that make a bold statement. Place it in a stylish pot and make it the centerpiece of your living room or hallway.
- Hanging Basket: If you want to save floor space, hang your rubber plant in a macrame or decorative hanging basket. This will add an interesting visual element to your indoor space.
- Corner Plant: Rubber plants do well in corners, so place one in a tall plant stand or a corner shelf. This will create a lush and green focal point in any room.
Pairing with other houseplants for a beautiful indoor garden
- Contrasting Colors: Pair your rubber plant with houseplants that have contrasting leaf colors, such as snake plants with their distinctive yellow stripes or philodendrons with their vibrant green leaves. This will create a visually stunning and dynamic indoor garden.
- Texture Contrast: Mix your rubber plant with houseplants that have different leaf textures, such as ferns with their delicate fronds or succulents with their thick and fleshy leaves. This will add depth and interest to your indoor garden.
- Height Variation: Combine your rubber plant with houseplants of varying heights to create a layered and visually appealing display. Place taller plants in the background and shorter plants in the front for a balanced look.
Remember, caring for your rubber plant is just as important as displaying it. Provide it with bright, indirect light, and water it when the top inch of soil feels dry. With proper care and a little creativity, your rubber plant will thrive and become a stunning addition to your indoor garden.
FAQ
How do I care for a rubber plant (ficus elastica) indoor?
Caring for a rubber plant is easy. Here’s a complete guide to help you give your rubber plant the best care possible.
What type of soil is best for a rubber plant?
Rubber plants grow best in well-draining potting soil that is rich in nutrients. Using a tropical plant potting mix or a mix of peat moss, perlite, and sand is recommended.
How often should I water my rubber plant?
Water your rubber plant when the top inch of soil feels dry. Typically, this means watering it every 1 to 2 weeks. However, it’s important not to overwater, as rubber plants are susceptible to root rot.
How much light does a rubber plant need?
Rubber plants thrive in bright, indirect light. Place them near a window where they can receive 2 to 3 hours of filtered sunlight a day. If there is not enough natural light, you can supplement with a grow light.
How fast do rubber plants grow?
Rubber plants can grow quickly under the right conditions. With proper care, you can expect your rubber plant to produce new leaves and increase in size within a few months.
Can I propagate a rubber plant?
Yes, you can propagate a rubber plant by taking stem cuttings. Place the stem cuttings in water or soil, and they will develop roots and grow into new plants.
Are rubber plants toxic to pets?
Yes, rubber plants are toxic to cats and dogs if ingested. It’s important to keep rubber plants out of reach of your furry friends to ensure their safety.
How do I keep my rubber plant clean?
Wipe the leaves of your rubber plant with a damp cloth to remove dust and keep them clean. This will also help the plant absorb more light and stay healthy.
Do rubber plants need plant food?
Yes, rubber plants benefit from regular feeding with a balanced liquid fertilizer. Follow the instructions on the fertilizer packaging for proper application and frequency.
Where can I buy rubber plants?
You can find rubber plants at garden centers, nurseries, or even online plant shops. Make sure to choose a healthy plant with vibrant leaves and sturdy stems.