How To Plant Elephant Ear Bulbs Indoors at Home For Beginners
Welcome to my guide on how to plant elephant ear bulbs! Whether you’re a beginner gardener or just looking to add a touch of tropical beauty to your garden or indoor space, planting elephant ear bulbs is a great choice. These stunning plants, also known as colocasia, alocasia, xanthosoma, and remusatia, feature large, heart-shaped leaves that can grow up to 8 feet tall. In this article, I will walk you through the step-by-step process of planting elephant ear bulbs or tuber, whether you want to grow them outdoors or indoors.
Key Takeaways:
- Elephant ear bulbs can be grown as perennials in zones 9 to 12 and as annuals in other regions.
- Choose a partly shady spot with well-fertilized, moist soil for planting elephant ear bulbs outdoors.
- Plant the bulbs about 4 inches deep in the soil, with the pointy end facing up.
- Water sparingly until the bulb sprouts, then maintain regular watering and fertilization.
- If planting in containers, choose a large pot with good drainage and a mixture of potting soil and compost.
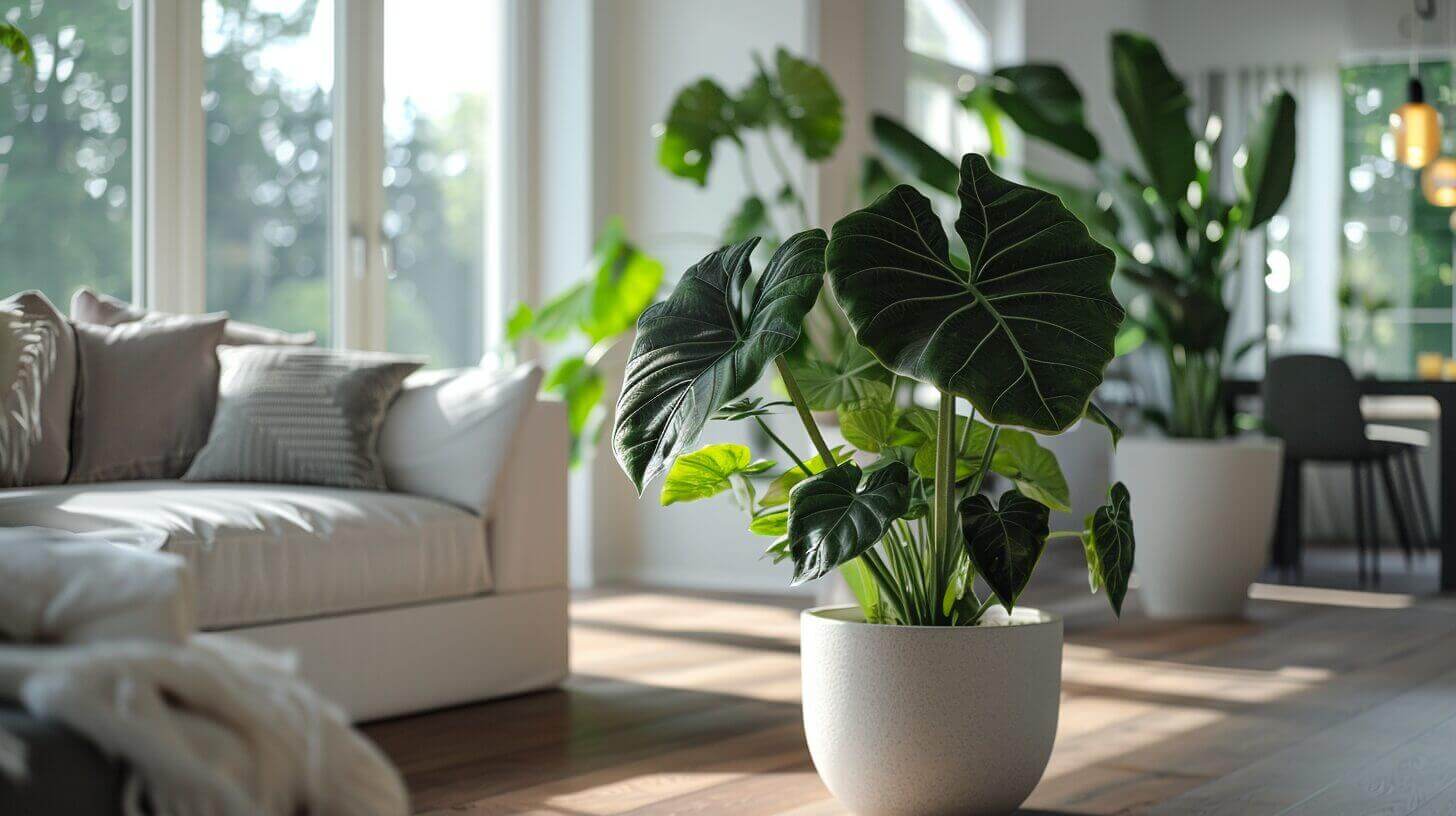
- Indoor elephant ear plants should be placed near a bright indirect light source.
- Care for elephant ear bulbs by providing consistent moisture, fertilizing every two weeks, and applying mulch to retain moisture.
Tips for Planting Elephant Ear Bulbs in Containers
If you’re looking to add a touch of tropical beauty to your indoor or outdoor space, elephant ears are tropical plants. Whether you have limited garden space or simply want to enjoy these stunning tropical plants up close, here are some tips to help you successfully grow elephant ear plants in pots.
Choosing the Right Container
When selecting a container for your elephant ear bulbs, opt for a large pot with good drainage. This will ensure that excess water can easily escape and prevent the bulbs from sitting in stagnant water, which can lead to root rot. Additionally, choose a container that is deep enough to accommodate the bulb and allow room for root growth.
Preparing the Soil
Fill the container with a mixture of potting soil and compost to provide the elephant ear bulbs with the necessary nutrients for healthy growth. This will also help ensure proper drainage and moisture retention. Plant the bulbs about 5 inches deep in the soil, with the pointed end facing up and the root disc down. The top of the bulb should be about 1 inch below the soil surface.
Providing the Right Conditions
Place the bulb into a container, then place it in a partly shady spot to protect the plants from intense sunlight, which can scorch their leaves. Water the plants when the top inch of soil feels dry, being careful not to overwater, as this can lead to root rot. Indoors, elephant ear plants should be placed near a bright indirect light source. Keep in mind that some varieties of elephant ear plants can be toxic if ingested, so take precautions if you have pets or small children.
Summary
Planting elephant ear bulbs in containers is a great way to enjoy these magnificent plants indoors or in small outdoor spaces. Choose a large pot with good drainage, fill it with a mixture of potting soil and compost, and plant the bulbs about 5 inches deep. Provide the plants with the right amount of water, light, and shade, and you’ll soon be enjoying the lush foliage of your elephant ear plants.
| Benefits of Planting Elephant Ear Bulbs in Containers | Considerations for Planting Elephant Ear Bulbs in Containers |
|---|---|
| 1. Allows for easy mobility and placement in desired areas. | 1. Choose a container with proper drainage to prevent waterlogging. |
| 2. Ideal for small gardens or limited outdoor spaces. | 2. Ensure the container is large enough to accommodate the bulb and allow room for root growth. |
| 3. Provides the opportunity to enjoy elephant ear plants up close and indoors. | 3. Place the container in a partly shady spot to protect the plants from intense sunlight. |
| 4. Can be a solution for gardeners with poor soil quality or drainage issues. | 4. Water the plants when the top inch of soil feels dry, being careful not to overwater. |
Caring for Elephant Ear Bulbs Indoors
When it comes to caring for elephant ear bulbs, providing the right conditions is key to their growth and overall health. These plants are known for their large, foliage with heart-shaped leaves, making them a stunning addition to any garden or indoor space. To keep your elephant ear bulbs thriving, here are some essential tips:
Foliage and Soil
Elephant ear bulbs thrive in leafy, moist soil that is well-draining. It’s important to ensure that the top inch of soil feels dry before watering again, preventing the risk of overwatering which can lead to root rot. To keep the soil consistently moist, water regularly and mulch the base of the plant to retain moisture and suppress weeds.
Fertilization and Repotting
To promote leafy growth, it’s essential to fertilize elephant ear bulbs every two weeks with a nitrogen-based fertilizer. This will provide the necessary nutrients for their foliage to flourish. If the plant outgrows its container, it’s important to transplant it into a larger one to accommodate its size. This will ensure proper root development and prevent the plant from becoming root-bound.
Proper Drainage and Fresh Soil
Proper drainage is crucial for the health of elephant ear bulbs. If the soil becomes compacted or depleted, it’s important to repot the plant in fresh soil. Adding peat moss to a loamy soil mixture can help improve drainage. For optimal growth, make sure the soil is well-draining and rich in organic matter, allowing the plant’s roots to breathe and preventing waterlogged conditions.
Caring for elephant ear bulbs requires attention to their specific needs. By providing the right conditions and following these tips, you can enjoy the beauty of these tropical beauties in your garden or indoor space.
| Caring Tips for Elephant Ear Bulbs | Summary |
|---|---|
| Provide leafy, moist soil | Ensures optimal growth and foliage development |
| Water regularly and mulch | Maintains consistent moisture and suppresses weeds |
| Fertilize every two weeks with nitrogen-based fertilizer | Promotes leafy growth and provides necessary nutrients |
| Repot into a larger container when necessary | Prevents root-bound conditions and allows for proper root development |
| Ensure proper drainage and use fresh soil | Prevents waterlogged conditions and promotes healthy root growth |
Overwintering Elephant Ear Bulbs
During the cold winter months, it is important to protect your elephant ear bulbs from the frost. To do this, you will need to dig up the bulbs before the first frost of the season. Make sure to remove any excess soil from the bulbs and allow them to dry in a warm, dark place with a temperature of around 60 degrees Fahrenheit.
Once the last frost of the winter season has passed, you can prepare a spot in the ground or choose a larger container with drainage holes to replant the bulbs. Dig a hole that is about 4-6 inches deep, ensuring that the bulbs are covered but not overcrowded. Elephant ears thrive in full sun and soil that is rich in organic matter. To retain moisture, you can mulch the soil surface.
Throughout the growing season, it is important to regularly water the plants, keeping the soil moist but not waterlogged. This will help the bulbs to thrive. Before the first frost of the next winter arrives, it is time to dig up the bulbs again. Store them in a warm, dark place with a temperature of around 60 degrees Fahrenheit. Cover the bulbs with vermiculite and keep the roots moist. This will ensure the survival of the bulbs until the next planting season.
By following these steps for overwintering your elephant ear bulbs, you can ensure their survival and enjoy their bold leaves and tropical beauty year after year. Remember to provide them with the right amount of sun, moisture, and organic matter to help them thrive throughout the growing season. With proper care, your elephant ear bulbs will continue to add a touch of drama and beauty to your garden or indoor space.
Growing Elephant Ears Indoors
Indoor gardening enthusiasts can enjoy the beauty of elephant ear plants by growing them indoors. These tropical beauties can thrive as houseplants, bringing a touch of lush greenery and exotic foliage to any indoor space.
To plant elephant ear bulbs indoors, start by selecting a large pot with good drainage. Fill the pot with well-draining soil, ensuring there is enough room for the bulb to grow. You can choose to start the bulbs in water or plant them directly in the soil, depending on your preference and the bulb’s current condition.
Place the elephant ear bulb in the potting mix with the pointy end facing up, and cover it with soil. Water the plant regularly, keeping the soil consistently moist but not waterlogged. These plants thrive in bright, indirect light, so place them near a window or provide artificial light if needed.
| Key Points | Tips |
|---|---|
| Light | Provide bright, indirect light or artificial light for at least 6-8 hours a day. |
| Watering | Keep the soil consistently moist. Water when the top inch of soil feels dry. |
| Temperature | These plants can tolerate a wide range of temperatures but prefer a warm environment between 65-85 degrees Fahrenheit. |
| Fertilizing | Apply a balanced liquid fertilizer every 2-4 weeks during the growing season. |
| Humidity | Elephant ear plants prefer high humidity. Mist the leaves regularly or place a tray of water near the plant to increase humidity. |
| Repotting | When the plant outgrows its container, repot it into a larger pot to accommodate its growth. |
With proper care and attention, indoor elephant ear plants can live for several years, providing you with a stunning display of bold leaves and a touch of tropical elegance.
Storing and Replanting Elephant Ear Bulbs
Once the growing season is over, it’s time to prepare your elephant ear bulbs for storage. Start by digging them up before the first frost arrives. Gently remove any excess soil, taking care not to damage the bulbs. Allow them to dry in a warm, dark place with a temperature of around 60 degrees Fahrenheit. This drying period helps prevent rot and disease during storage.
When your bulbs are dry, it’s time to store them for the winter. Place them in a well-ventilated paper bag or container, ensuring they have proper air circulation. Find a cool and dry location for storage, such as a basement or garage. Avoid extreme temperatures and moisture, as these can cause damage to the bulbs.
When spring arrives, it’s time to replant your elephant ear bulbs. Follow the same planting instructions as before, whether you’re planting them directly in the ground or in containers. Make sure to choose a sunny spot with well-draining soil. Remember to plant the bulbs with the pointy end facing up. With proper care and attention, your stored bulbs will reward you with their stunning foliage once again.
FAQ
How do I plant elephant ear bulbs?
Wait for the weather to warm up to at least 70 degrees Fahrenheit in the spring. Choose a partly shady spot with well-fertilized, moist soil. Plant the bulbs about 4 inches deep in the soil, with the pointy end facing up. Space them 2 to 4 feet apart to allow room for growth. Water sparingly until the bulb sprouts, and then maintain regular watering and fertilization to help the plant thrive.
Can I plant elephant ear bulbs in containers?
Yes, you can plant elephant ear bulbs in containers for indoor or outdoor use. Choose a large pot with good drainage and fill it with a mixture of potting soil and compost. Plant the bulb 5 inches deep in the soil, with the nub end facing up and the root disc down. Ensure the top of the bulb is about 1 inch below the soil surface. Place the container in a partly shady spot and water when the top inch of soil feels dry.
How do I care for elephant ear bulbs?
Elephant ear bulbs prefer rich, well-drained soil with consistent moisture. Fertilize the plants every two weeks with a nitrogen-based fertilizer to promote leafy growth. Apply a layer of mulch around the base of the plant to retain moisture and suppress weeds. Water the plant when the top inch of soil feels dry, ensuring the soil is moist but not waterlogged. Proper drainage is essential to prevent root rot.
How do I overwinter elephant ear bulbs?
In regions with cold winters, dig up the bulbs before the first frost and store them indoors for the winter. After the last frost has passed, plant the bulbs in the ground or in a larger container with drainage holes. Elephant ears love full sun and soil rich in organic matter. During the growing season, water the plants regularly, keeping the soil moist but not waterlogged. Before the first frost of the next winter, dig up the bulbs and store them in a warm, dark place.
Can I grow elephant ears indoors?
Yes, elephant ears can be grown indoors as houseplants. They thrive in bright, indirect light and can tolerate a variety of indoor temperatures. Plant the bulbs in pots with well-draining soil, ensuring they have enough room to grow. Water the plants regularly, keeping the soil moist but not waterlogged. Indoor elephant ears can live for several years with proper care, adding a touch of tropical beauty to your home.
How do I store and replant elephant ear bulbs?
To store elephant ear bulbs, dig them up before the first frost and allow them to dry in a warm, dark place. Store them in a paper bag or container with proper ventilation. In the spring, replant the bulbs following the same planting instructions. Elephant ear bulbs can also be purchased from garden centers or online. With proper care and attention, your elephant ear bulbs will continue to thrive and provide stunning foliage year after year.

