How To Plant Elephant Ear Bulbs: A Step-By-Step Guide For Beginners
Elephant ear plants, also known as colocasia, alocasia, and xanthosoma, are tropical plants that can add drama to any garden. They can grow up to 8 feet tall with leaves several feet wide. While they are native to tropical regions, they can be grown in most hardiness zones as perennials in zones 9 to 12 and as annuals in other regions. Planting elephant ear bulbs is a great way to grow these impressive plants. They prefer rich, well-fertilized soil, partial shade, and plenty of moisture. In this step-by-step guide, we will walk you through the process of planting elephant ear bulbs and caring for them.
Key Takeaways:
- Elephant ear plants are tropical plants that can grow up to 8 feet tall with wide leaves.
- They can be grown in most hardiness zones as perennials in zones 9 to 12 and as annuals in other regions.
- Plant elephant ear bulbs in spring once the soil temperature reaches at least 70 degrees Fahrenheit.
- Choose a sunny location with partial shade and well-draining soil rich in organic matter for planting.
- Regular watering, fertilization, and winter care are important for the health and growth of elephant ear plants.
When and Where to Plant Elephant Ear Bulbs
Planting elephant ear bulbs at the right time and in the right location is crucial for their successful growth. Here are some important factors to consider:
Soil Temperature
Elephant ear bulbs should be planted in the spring, once the soil temperature has reached at least 70 degrees Fahrenheit. This ensures that the bulbs will have warm soil to promote healthy root development and growth.
Location
When choosing a spot to plant your elephant ear bulbs, look for an area that receives partial shade. While they enjoy some sun, too much direct sunlight can scorch the leaves. Additionally, avoid planting them in areas with too much shade, as this can result in leggy growth.
Soil Conditions
Elephant ear plants thrive in well-draining soil that is rich in organic matter. Prepare the planting area by mixing in compost or organic matter to improve soil fertility and drainage. This will provide the bulbs with the nutrients they need for healthy growth.
By planting your elephant ear bulbs when the soil temperature is right and choosing a suitable location with the right soil conditions, you’ll set them up for success and ensure they have the best chance of thriving in your garden.
| Factors to Consider | Planting Conditions |
|---|---|
| Soil Temperature | At least 70°F |
| Location | Partial shade |
| Soil Conditions | Well-draining and rich in organic matter |
How to Plant Elephant Ear Bulbs
Planting elephant ear bulbs is a straightforward process that requires a few key steps to ensure successful growth. By following these guidelines, you can enjoy the beauty and drama of these tropical plants in your own garden.
Planting Depth and Distance
When planting elephant ear bulbs, it is important to consider the appropriate planting depth and distance between bulbs. Dig a hole that is approximately 4 inches deep and place the bulb in the hole with the pointed end facing up. If planting multiple bulbs, space them 2 to 4 feet apart to allow for their growth.
Choosing the Right Containers
If you prefer to plant elephant ear tuber indoors in containers, choose a container that provides adequate space for the bulb to grow. Use a potting mix blended with compost to create a nutrient-rich potting soil. Ensure that the container has good drainage to prevent waterlogging, which can cause the bulbs to rot.
Bulb Orientation
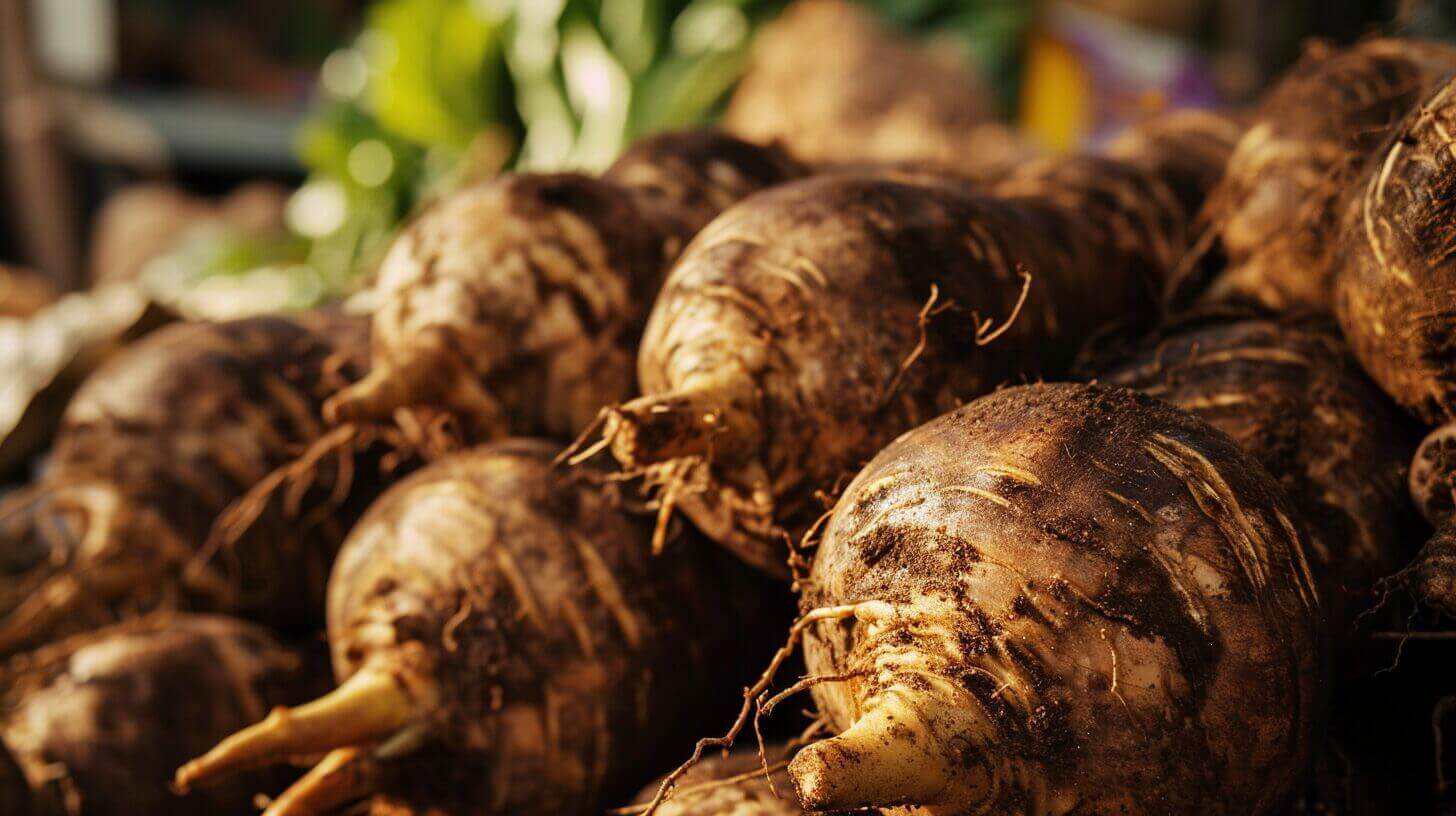
When planting elephant ear bulbs, it is essential to orient them correctly. The pointed end of the bulb should face up, while the root disc should be placed down in the soil. This orientation ensures that the bulb can establish proper root growth and emerge through the soil’s surface.
Ensuring Proper Drainage
Whether planting in the ground or in containers, ensuring proper drainage is crucial for the health of elephant ear bulbs. Excess moisture can lead to rot and other fungal diseases. To improve drainage, consider adding organic matter to the soil, such as compost or peat moss, to create a well-draining environment for the bulbs.
By following these planting guidelines, you can establish a strong foundation for your elephant ear bulbs, setting them up for healthy growth and vibrant foliage. Remember to water the bulbs regularly and provide the necessary care throughout the growing season to ensure their continued success.
How to Care for Elephant Ear Bulbs
Once you have planted your elephant ear bulbs, proper care is essential to ensure their healthy growth. Here are some important steps to care for your elephant ear plants:
Watering
Keep the soil around your elephant ear bulbs consistently moist, but be careful not to overwater. Overwatering can lead to rotting of the bulbs. Monitor the moisture level of the soil and water the plants during dry periods. In winter, reduce watering as the plants enter a dormant period.
Fertilizer
Regular fertilization is important for the optimal growth of your elephant ear plants. Use a nitrogen-based fertilizer every three to four weeks to provide the necessary nutrients. This will promote healthy foliage and overall plant development. Follow the instructions on the fertilizer packaging for proper application.
Winter Care and Overwintering
In colder regions, where temperatures drop below freezing, elephant ear bulbs need to be protected during the winter months. Before the first frost, carefully dig up the bulbs, making sure to remove any soil. Store them in a cool, dark place, such as a basement or garage, with temperatures between 50-60 degrees Fahrenheit. Ensure good ventilation to prevent mold and rot. Check on the bulbs periodically and discard any that show signs of damage or disease. Replant the bulbs in the spring, once the frost danger has passed.
Storage
If you need to store your elephant ear bulbs for an extended period, such as during a move or if you have excess bulbs, follow these guidelines. First, clean off any remaining soil from the bulbs. Then, place them in a well-ventilated container or bag filled with a moisture-free medium, such as peat moss. Store the bulbs in a cool, dark area with moderate humidity, such as a basement or closet. Regularly check on the bulbs to ensure they remain firm and healthy. Replant them in the appropriate season when you are ready to grow them again.
By following these care instructions, you can enjoy the beauty and lush foliage of your elephant ear plants for years to come.
“Proper care is essential to ensure the healthy growth of elephant ear bulbs.”
Tips for Growing Elephant Ear Plants
If you want to successfully grow elephant ear plants, there are a few essential tips to keep in mind. These tropical plants can add a touch of exotic beauty to your garden, and with the right care, they will thrive and flourish. Here are some key tips to help you grow healthy and vibrant elephant ear plants:
1. Sunlight
When it comes to sunlight, elephant ear plants have specific preferences. Some varieties can handle full sun exposure, while others prefer partial shade. It’s important to research the specific needs of the variety you have to ensure proper growth. If you’re unsure, it’s best to provide filtered sunlight or partial shade to prevent scorching of leaves and stunted growth.
2. Soil Acidity
Elephant ear plants thrive in slightly acidic soil. Make sure to test the pH level of your soil and adjust it if necessary. Adding organic matter like compost can help improve soil acidity and provide essential nutrients for the plants’ growth. Regularly monitoring and maintaining the correct soil pH will contribute to the overall health and vitality of your elephant ear plants.
3. Spacing
Proper spacing is crucial for elephant ear plants, as they can grow quite large. Be sure to provide enough space between each plant to accommodate their growth. Follow the recommended spacing guidelines for the specific variety you have to prevent overcrowding and enable sufficient airflow. This will help prevent diseases and ensure that each plant has enough room to spread out and thrive.
4. Mulching
Mulching around your elephant ear plants can provide several benefits. Mulch helps retain moisture in the soil, preventing it from drying out too quickly. It also helps suppress weeds, reducing competition for nutrients and water. Apply a layer of organic mulch around the base of your plants, making sure not to cover the leaves or stems. This will help keep the soil consistently moist and provide a protective barrier for the roots.
| Summary | Key Points |
|---|---|
| Sunlight | Provide full sun or partial shade, depending on the variety. |
| Soil Acidity | Maintain slightly acidic soil by testing and adjusting the pH level if needed. |
| Spacing | Follow recommended spacing guidelines to give the plants room to grow. |
| Mulching | Apply organic mulch to retain moisture and suppress weeds. |
Frequently Asked Questions About Planting Elephant Ear Bulbs
What month do you plant elephant ear bulbs?
Elephant ear bulbs should be planted in the spring, once the soil temperature has reached 70 degrees Fahrenheit.
Do elephant ear bulbs come back every year?
Elephant ear bulbs can come back every year in regions with milder winters, but in colder regions, they may need to be dug up and stored over winter.
How long does it take for elephant ears to grow from bulbs?
Elephant ears typically sprout within 3 to 8 weeks after planting.
Which end goes down on elephant ear bulbs?
The pointed end of the bulb should be facing up when planting elephant ear bulbs.
Can elephant ear bulbs be left in the ground?
In regions with mild winters, elephant ear bulbs can be left in the ground, but in colder regions, they should be dug up and stored.
Should you soak elephant ear bulbs before planting?
No, it is not necessary to soak elephant ear bulbs before planting as it can lead to fungal rots and waterborne illnesses.


