How to Split & Propagate Elephant Ear Plant: Step-by-Step Guide Divide An Elephant Ear
Welcome to my guide on how to propagate an elephant ear plant through splitting. If you’re looking to expand your elephant ear plant collection or share these stunning tropical plants with friends and family, splitting is a simple and effective method. By following the right techniques, you can successfully divide and propagate elephant ears from cuttings, offering the opportunity for new growth and enjoyment.
Key Takeaways:
- Splitting an elephant ear plant is best done when the parent plant goes dormant in the fall.
- It’s important to sterilize your tools to prevent the transfer of diseases.
- Dig up the parent plant carefully, preserving healthy tubers and roots.
- Select and separate healthy tubers from the parent plant.
- Plant the divided tubers immediately or store them until spring.
- Provide the right growing conditions, including sunlight, watering, and temperature.
- Care for the new plants by fertilizing and spacing them appropriately.
- Successful propagation requires timing, proper tools, and ideal growing conditions.
The Importance of Sterilizing Tools
Before beginning the process of dividing an elephant ear plant, it is important to ensure that your tools are properly sterilized. Sterilizing your tools helps prevent the transfer of any diseases that may be present on the tools or the plant itself. By taking this precaution, you can increase the chances of successful propagation and maintain the overall health of both the parent and new plants.
To sterilize your tools, you can use a simple solution of bleach and water. Mix 1 part bleach with 9 parts water in a clean bucket or container. Then, place your pruning knife and shovel into the solution and let them soak for about 30 minutes. This will effectively kill any pathogens or bacteria that may be present on the tools.
After the tools have soaked, be sure to rinse them thoroughly with clean water to remove any residual bleach. This will prevent any potential harm to the plants. By sterilizing your tools before dividing an elephant ear plant, you are taking an important step in ensuring the success of the propagation process.
“Sterilizing your tools helps prevent the transfer of any diseases, increasing the chances of successful propagation and maintaining the overall health of both the parent and new plants.”
The Importance of Sterilizing Tools
Before beginning the process of dividing an elephant ear plant, it is important to ensure that your tools are properly sterilized. Sterilizing your tools helps prevent the transfer of any diseases that may be present on the tools or the plant itself. By taking this precaution, you can increase the chances of successful propagation and maintain the overall health of both the parent and new plants.
To sterilize your tools, you can use a simple solution of bleach and water. Mix 1 part bleach with 9 parts water in a clean bucket or container. Then, place your pruning knife and shovel into the solution and let them soak for about 30 minutes. This will effectively kill any pathogens or bacteria that may be present on the tools.
After the tools have soaked, be sure to rinse them thoroughly with clean water to remove any residual bleach. This will prevent any potential harm to the plants. By sterilizing your tools before dividing an elephant ear plant, you are taking an important step in ensuring the success of the propagation process.
Table: Sterilizing Tools
| Tool | Sterilization Method |
|---|---|
| Pruning Knife | Soak in a solution of 1 part bleach to 9 parts water for 30 minutes, then rinse with clean water. |
| Shovel | Soak in a solution of 1 part bleach to 9 parts water for 30 minutes, then rinse with clean water. |
Digging Up the Parent Plant
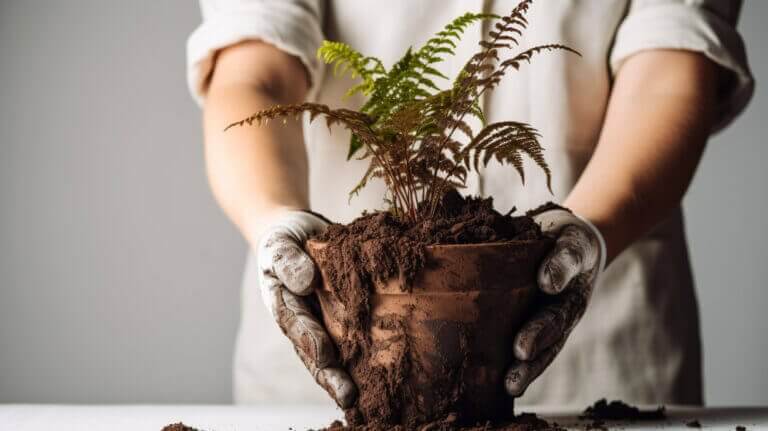
When propagating an elephant ear plant, the first step is to dig up the parent plant. Whether it’s grown in the ground or in a pot, careful excavation is crucial to ensure the health of both the parent plant and the new tubers. If the plant is in a pot, gently grab onto the stems and lift it out of the container. Be mindful of any healthy tubers and roots, avoiding any unnecessary damage.
If the elephant ear plant is in the ground, you’ll need to use your hands or a shovel to carefully dig around the plant and loosen the soil. Once the soil is loosened, gently lift the plant out of the ground, taking care to preserve the integrity of the roots and tubers. By handling the parent plant with caution, you increase the chances of successful separation and propagation.
After digging up the parent plant, it’s important to remove any excess soil clinging to the tubers. This can be done by gently shaking the plant or using your hands to brush off the soil. Clearing away the soil will allow you to better inspect the tubers and select the healthiest ones for propagation. Removing soil also helps minimize the risk of introducing pests or diseases to the new plants.
Table: Comparison of Elephant Ear in-Ground Plant and Elephant Ear in Pot
| Aspect | Elephant Ear in-Ground Plant | Elephant Ear in Pot |
|---|---|---|
| Plant Size | Larger, spread out | Restricted by pot size |
| Root System | Spread out in the soil | Contained within the pot |
| Winter Storage | Protected from frost when mulched | Needs to be dug up and stored indoors |
| Mobility | Cannot be moved easily | Easily movable |
Selecting Healthy Tubers and Dividing Elephant Ear Plants By Cutting
When dividing an elephant ear plant, it is crucial to select and separate healthy tubers to ensure successful propagation. After carefully removing the parent plant from the soil, gently shake or brush off any excess dirt to get a clear view of the tubers. Inspect each tuber closely, looking for signs of health such as firmness, vibrant color, and the presence of new root buds or sprouts. Avoid selecting tubers with blemishes, soft spots, or signs of rot, as these may indicate disease.
To separate the new tubers from the parent plant tubers, it is recommended to use a sharp knife. Carefully untangle the roots of the new bulbs from the parent tubers and cut them where they intersect. Make clean cuts to minimize damage and ensure the future growth of the new plants. Take your time during this process to avoid any accidental injuries to the tubers or yourself. Safety should always be a priority when handling sharp tools.
Knife for Dividing
“When selecting a knife for dividing elephant ear tubers, choose one that is sharp and clean. A clean, sharp knife will make precise cuts and minimize the risk of introducing any pathogens. It is a good practice to sterilize the knife before use by dipping it in a solution of 1 part bleach to 9 parts water for 30 minutes, then rinsing with clean water. This extra step helps prevent the spread of diseases and ensures the health of your new plants.”
After separating the healthy tubers, you can proceed with the planting process to encourage the growth of your newly propagated elephant ear plants. Remember to provide the right growing conditions, such as sunlight, soil moisture, and temperature, to maximize their chances of thriving.
| Tuber Characteristics | Selection Criteria |
|---|---|
| Firmness | Select tubers that are firm to the touch, indicating good health. |
| Color | Choose tubers with a vibrant color, which suggests vitality. |
| Root Buds or Sprouts | Look for tubers that have at least one new root bud or sprout, indicating active growth. |
| Blemishes or Rotten Areas | Avoid tubers with any blemishes, soft spots, or signs of decay, as these may indicate disease. |
Propagate Elephant Ears Plants – Planting the Divided Tubers
Once you have successfully separated the tubers from the parent plant, it’s time to plant them and watch them grow into new elephant ear plants. Whether you choose to plant them immediately in a container or store them indoors until spring, proper planting techniques will ensure their successful establishment.
If you decide to plant the divided tubers indoors, select a large pot with drainage holes and fill it with well-draining potting soil. Make a well in the soil slightly larger than the tuber and place the tuber in the well with the pointy side facing up. Lightly pack the soil around the tuber and water gently. It’s important to provide adequate moisture for the tubers to encourage healthy root development.
If you prefer to store the tubers until spring, place each tuber in a separate paper bag and store them in a cool, dark place. This will help them remain dormant until the weather conditions are suitable for outdoor planting.
When the time comes to plant the tubers outdoors, choose a location that offers full sun to part shade. Dig a hole for each tuber, making sure it is deep enough to accommodate the entire tuber. Place the tuber in the hole with the pointy side facing up, cover it with soil, and water thoroughly. Adequate watering after planting will help the tuber settle in its new environment and encourage healthy growth.
Remember to follow the specific care instructions for the type of elephant ear plant you are propagating, as different varieties may have slightly different requirements. With proper care and attention, your newly planted divided tubers will soon flourish into beautiful and vibrant elephant ear plants.
| Indoor Planting | Outdoor Planting |
|---|---|
| 1. Select a large pot with drainage holes. | 1. Choose a planting location with full sun to part shade. |
| 2. Fill the pot with well-draining potting soil. | 2. Dig a hole for each tuber. |
| 3. Make a well in the soil slightly larger than the tuber. | 3. Place the tuber in the hole with the pointy side facing up. |
| 4. Place the tuber in the well with the pointy side up. | 4. Cover the tuber with soil. |
| 5. Lightly pack soil around the tuber. | 5. Water the tuber thoroughly. |
| 6. Water the tuber gently. |
Providing the Right Growing Conditions
When it comes to cultivating healthy elephant ear plants, it’s important to provide them with the right growing conditions. Here are some key factors to consider:
Sunlight:
Elephant ear plants thrive in areas with plenty of sunlight, ideally receiving 6 or more hours of sun per day. To ensure optimal growth, choose a planting location that offers full sun to part shade. Avoid areas with excessive shade, as this can hinder the plant’s ability to produce large, lush leaves.
Planting Location:
When selecting a planting location for your elephant ear plants, make sure to consider their size and growth habit. These plants can grow quite large, so give them plenty of space to spread out. Plant them at least 3-6 feet apart to allow for proper air circulation and to prevent overcrowding.
Watering:
Elephant ear plants prefer consistently moist potting mix soil, so it’s important to water them regularly. Check the soil depth before watering to ensure that it has dried out slightly but not completely. Avoid overwatering, as soggy soil can lead to root rot. Water the soil around the base of the plant, rather than watering the leaves, to prevent fungal diseases.
Temperature Requirements:
For optimal growth, elephant ear plants require temperatures above 70°F (21°C). Ensure that they are placed in a warm environment that meets this temperature requirement. If you live in a colder climate, consider growing elephant ear plants in containers that can be moved indoors during the cooler months.
| Optimal Growing Conditions for Elephant Ear Plants | |
|---|---|
| Sunlight | 6 or more hours of sun per day |
| Planting Location | Full sun to part shade, 3-6 feet apart |
| Watering | Consistently moist soil, avoid overwatering |
| Temperature Requirements | Above 70°F (21°C) |
Caring for the New Plants
Proper care is essential for the healthy growth of new elephant ear plants. Here are some key factors to consider:
Nitrogen-Rich Fertilizer
I recommend applying a nitrogen-rich fertilizer once a month to promote vigorous growth. Nitrogen is an essential nutrient that aids in the development of lush foliage. Choose a well-balanced fertilizer with a higher nitrogen content, such as a 10-10-10 or 20-10-10 formulation.
Soil Moisture
Elephant ear plants thrive in consistently moist soil. Monitor the moisture level regularly and water the plants when the top inch of soil feels dry. Be careful not to overwater, as this can lead to root rot. Aim to keep the soil evenly moist but not waterlogged.
Spacing Elephant Ears
Give your elephant ear plants enough space to grow and spread. Plant them with a spacing of 3-6 feet apart to allow adequate airflow and prevent overcrowding. Providing ample space ensures that each plant has sufficient access to sunlight and nutrients, promoting healthy growth.
General Plant Care Tips
- Remove any weeds or competing plants around your elephant ear plants to prevent nutrient competition
- Mulch the soil around the plants to retain moisture and suppress weed growth
- Protect the plants from strong winds, as their large leaves can be easily damaged
- Monitor for pests, such as aphids or snails, and take appropriate measures if necessary
By providing these essential care measures, you can ensure that your new elephant ear plants thrive and add beauty to your garden or indoor space.
Tips for Successful Propagation
When it comes to propagating elephant ear plants, timing is key. The best time to divide these plants is in the fall when they go dormant. Dividing during the cooler months not only puts less stress on the plant but also makes it easier to handle. So, if you’re planning to propagate your elephant ear, make sure to choose the right season.
Another important aspect of successful propagation is using the right methods. When dividing an elephant ear plant, it’s crucial to use sharp and clean tools to prevent any disease transfer. By sterilizing your pruning knife and shovel with a bleach solution, you can ensure the health of both the parent and new plants.
Lastly, providing the right growing conditions is vital for the successful propagation of elephant ear plants. These plants thrive in areas with plenty of sunlight, so choose a planting location that offers full sun to part shade. Ensure the soil is consistently moist but not soaking wet, and water the soil around the base of the plant. Additionally, keep the temperature above 70°F (21°C) to create an ideal environment for your propagated elephant ear plants to thrive.
FAQ
When is the best time to split an elephant ear plant for propagation?
The best time to split an elephant ear plant is in the fall when it starts to go dormant.
Why is it important to sterilize tools for dividing an elephant ear plant?
Sterilizing tools helps prevent the transfer of diseases between plants.
How do I dig up the parent plant?
Carefully lift the plant out of its pot or use a shovel to loosen the soil and lift it out if it’s planted in the ground.
How do I select and separate healthy tubers?
After removing the parent plant from the soil, select tubers with healthy roots and cut them away from the parent plant tubers where they intersect.
How do I plant the divided tubers?
You can either replant them immediately in a container or store them indoors until spring. If planting indoors, place the tuber in a large pot with well-draining soil. If storing, place each tuber in a separate paper bag and store in a cool, dark place.
What are the right growing conditions for elephant ear plants?
Elephant ear plants thrive in areas with plenty of sunlight, moist soil, and temperatures above 70°F (21°C). They prefer full sun to part shade and should be placed in warm environments.
How do I care for the new elephant ear plants?
Apply a nitrogen-rich fertilizer once per month, keep the soil consistently moist, and provide enough space for each plant by spacing them 3-6 feet apart.
What are some tips for successful propagation of elephant ear plants?
Split the plant during the cooler months when it is dormant, use sharp and clean tools for dividing, and provide the right growing conditions such as sunlight, soil moisture, and temperature.