Repotting and Dividing Cast Iron Plant(Aspidistra Elatior) for Propagation
The cast iron plant, also known as Aspidistra elatior, is a popular houseplant that can be easily propagated through division. With proper care and the right technique, you can multiply your cast iron plants and enjoy more greenery in your indoor space. In this comprehensive guide, I will walk you through the step-by-step process of repotting and dividing aspidistra houseplants for propagation. From the best time to divide the plant to preparing the potted plant or garden plant for division, dividing the plant properly, repotting the divided plant, and planting it back in its pot or garden, you’ll find all the information you need to successfully propagate your cast iron plant.
Key Takeaways:
- Repotting and dividing aspidistra houseplants is a simple way to propagate your cast iron plants.
- The best time to divide a cast iron plant is in the spring to early summer, before its dormant phase.
- Preparing the potted or garden plant involves removing it from the pot or excavating the plant gently.
- When repotting, choose new pots slightly larger than the root ball and use fresh potting soil.
- Proper watering and care after repotting will help the divided cast iron plant thrive and produce new growth.
When is the Best Time to Divide a Cast Iron Plant?
The best time to divide a cast iron plant for propagation is in the spring to early summer, before the plant enters its dormant phase. This timing allows the plant to establish itself and recover from the division before its growth slows down. Dividing the plant during this period increases the chances of successful propagation and ensures that the divided sections have ample time to develop stronger roots.
If you have potted cast iron plants, it is recommended to divide them every 3 to 5 years to prevent them from becoming rootbound. This regular division promotes healthier growth and avoids overcrowding in the pot. The same timeline can be followed for garden specimens, allowing them enough time to develop robust root systems.
By dividing your cast iron plants during the optimal time, you can ensure that the divided sections have a higher chance of thriving and producing new growth. It is important to consider the plant’s natural growth cycle and provide the necessary care and attention during and after the division process to maximize success.
Table: Best Time to Divide a Cast Iron Plant
| Plant Type | Best Time to Divide |
|---|---|
| Potted Plants | Spring to early summer (every 3 to 5 years) |
| Garden Specimens | Spring to early summer (every 3 to 5 years) |
How to Prepare the Potted Plant or Garden Plant for Division
Before dividing your cast iron plant, it is crucial to properly prepare the potted plant or garden plant. The following steps will guide you through the preparation process:
Preparing a Potted Plant:
- Begin by gently removing the plant from its pot. To do this, use a butter knife to loosen the soil around the edges of the pot.
- Once the soil is loosened, gently slide the plant out of the pot.
- Knock away any excess dirt from the roots, being careful not to damage them.
- Inspect the roots for any signs of root rot. If you notice any diseased roots, use a sterile knife to cut them away.
- Next, gently tease the roots apart using your fingers. Be careful not to break or damage them.
- Pot each division immediately in a new pot with fresh potting soil. Ensure that each division has enough space and soil to grow.
Preparing a Garden Plant:
- Start by gently excavating around the plant using a garden fork or trowel.
- Once the plant is loosened, carefully lift it out of the ground.
- Knock away any loose dirt from the roots.
- Inspect the roots for any signs of disease or rot. Use a sterile knife to remove any diseased roots.
- Just like with a potted plant, gently tease the roots apart using your fingers.
- Follow the same steps as with a potted plant and pot each division immediately.
Example Table:
| Preparation Steps | Potted Plant | Garden Plant |
|---|---|---|
| 1 | Gently remove the plant from its pot. | Excavate around the plant using a garden fork or trowel. |
| 2 | Loosen the soil with a butter knife and slide the plant out of the pot. | Lift the plant out of the ground. |
| 3 | Knock away excess dirt from the roots. | Knock away loose dirt from the roots. |
| 4 | Inspect the roots for signs of root rot. | Inspect the roots for signs of disease or rot. |
| 5 | Use a sterile knife to remove diseased roots. | Use a sterile knife to remove diseased roots. |
| 6 | Gently tease the roots apart using your fingers. | Gently tease the roots apart using your fingers. |
| 7 | Pot each division immediately in a new pot with fresh potting soil. | Pot each division immediately. |
Repotting and Planting a Divided Cast Iron Plant
Once you have successfully divided your cast iron plant, it’s important to properly repot and plant the divided sections. Start by choosing new pots that are slightly larger than each division’s root ball. This will allow room for the roots to spread and grow. Fill the bottom third of the pot with fresh potting soil, ensuring that it is well-draining and provides the necessary nutrients for the plant.
Next, test fit each division in its new pot and adjust the soil height accordingly. You want the divided plant to be at the same level as the original plant, neither too deep nor too shallow. Slowly fill in the soil around the plant, making sure to spread out any loose roots as you go. Gently tamp the soil down to provide stability for the plant.
After repotting, give the plant a light watering to help settle the soil and provide hydration. Avoid overwatering, as this can lead to root rot and other issues. The goal is to provide enough moisture to promote root establishment without drowning the plant.
If you are planting a divided cast iron plant in the garden, follow the same steps. Ensure that the plant is placed at the proper depth, adjusting any loose roots and tamping down the soil for stability. Give the plant a light watering to support its transition into the garden environment.
FAQ
How much water does a cast-iron plant need?
The cast-iron plant is a slow-growing plant and doesn’t need much water. It’s important to keep the soil moist but not waterlogged. Overwatering can lead to root rot.
How do you propagate Aspidistra Elatior?
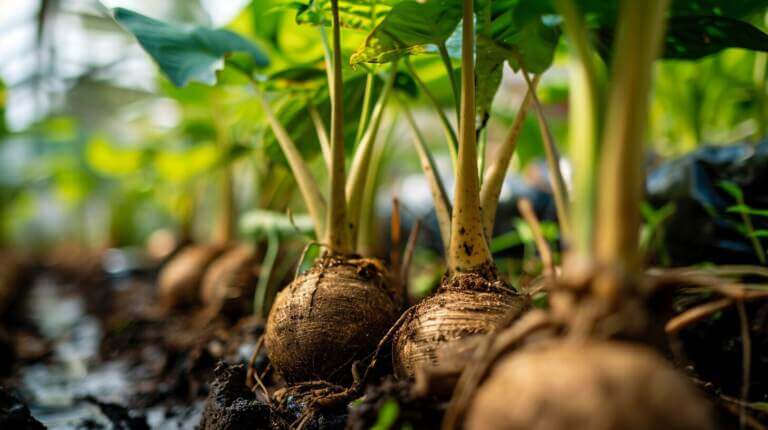
To propagate cast iron plants, carefully remove the plant from the pot and cut the rhizome into sections. Each section should have at least one leaf. Plant each section in a pot with drainage holes and a well-draining potting mix.
What is the best way to care for a cast-iron plant?
Cast iron plant care involves placing the plant indoors where it can get indirect sunlight. The plant doesn’t need direct sun and can even grow under fluorescent lights. Water the plant when the top inch of soil is dry.
How do you propagate a cast-iron plant?
Cast iron plant propagation can be done by dividing the plant during repotting. Spring or summer is the best time to do this. After removing the plant from its pot, you can cut the rhizome into sections and plant each section in a new pot.
What type of potting mix is best for a cast-iron plant?
A well-draining potting mix is best for a cast-iron plant. The mix should have good drainage to prevent waterlogging. You can use a pot with drainage holes to further ensure proper drainage.
How does a cast-iron plant grow?
Cast iron plants grow slowly and prefer shady locations. They don’t need much water and can tolerate a range of indoor conditions, making them a popular houseplant.
What do cast-iron plants need to thrive?
Cast iron plants need indirect sunlight, well-draining soil, and a pot with drainage holes. They don’t need much water and can tolerate a range of indoor conditions.