Repotting Cast Iron Plants(Aspidistra Elatior): When to Transplant and How to Do It Right
As a proud owner of a cast iron plant, I know the importance of providing the best care for this hardy and resilient houseplant. One crucial aspect of maintaining a healthy cast iron plant is knowing when and how to repot it. In this article, I will guide you through the process of repotting your cast iron plant, ensuring its continued growth and vigor.
Key Takeaways:
- Transplant cast iron plants in early spring to late winter to establish their root system before the active growing season.
- Plant cast iron plants 2-3 feet apart to allow space for growth and proper air circulation.
- Choose well-drained soil enriched with organic matter for ideal growing conditions.
- Water thoroughly after transplantation to prevent transplant shock and protect from intense direct sunlight.
- Prune damaged roots or leaves if necessary for healthier growth.
When to Transplant or Repot Aspidistra Elatior
Ideal time for transplanting
Transplanting your plants at the right time can significantly increase the success rate of the process. As a general rule, it is best to transplant your plants before they start flowering. If your plants typically bloom in the spring, plan to make your move early, well before they shower themselves with petals. Alternatively, you can wait until after the flowering season is over. By transplanting your plants during these periods, you minimize the stress on the plants and allow them to establish their root system in their new location more easily.
Factors to consider before transplanting
Timing and weather are crucial considerations to ensure successful transplantation. If you live in a temperate zone, the optimal times for transplanting are spring and fall when the soil temperatures are above 35°F. These seasons offer optimal conditions for plant growth, with roots being more active during these periods.
Before transplanting, assess the current health of the plant. If it is not in the best condition, wait until it has regained its vigor before attempting to move it. Additionally, consider the specific needs of the plant species you are working with. Some plants may have preferences for certain seasons or growth patterns, so researching the specific requirements of your plants can help guide your transplanting decisions.
When transplanting, it is essential to ensure that you dig up the entire plant, taking care to rescue enough of the root system. This will help minimize shock and allow the plant to establish itself more quickly in its new location. When replanting, ensure that the new site has suitable soil conditions and ample sunlight for the specific plant species.
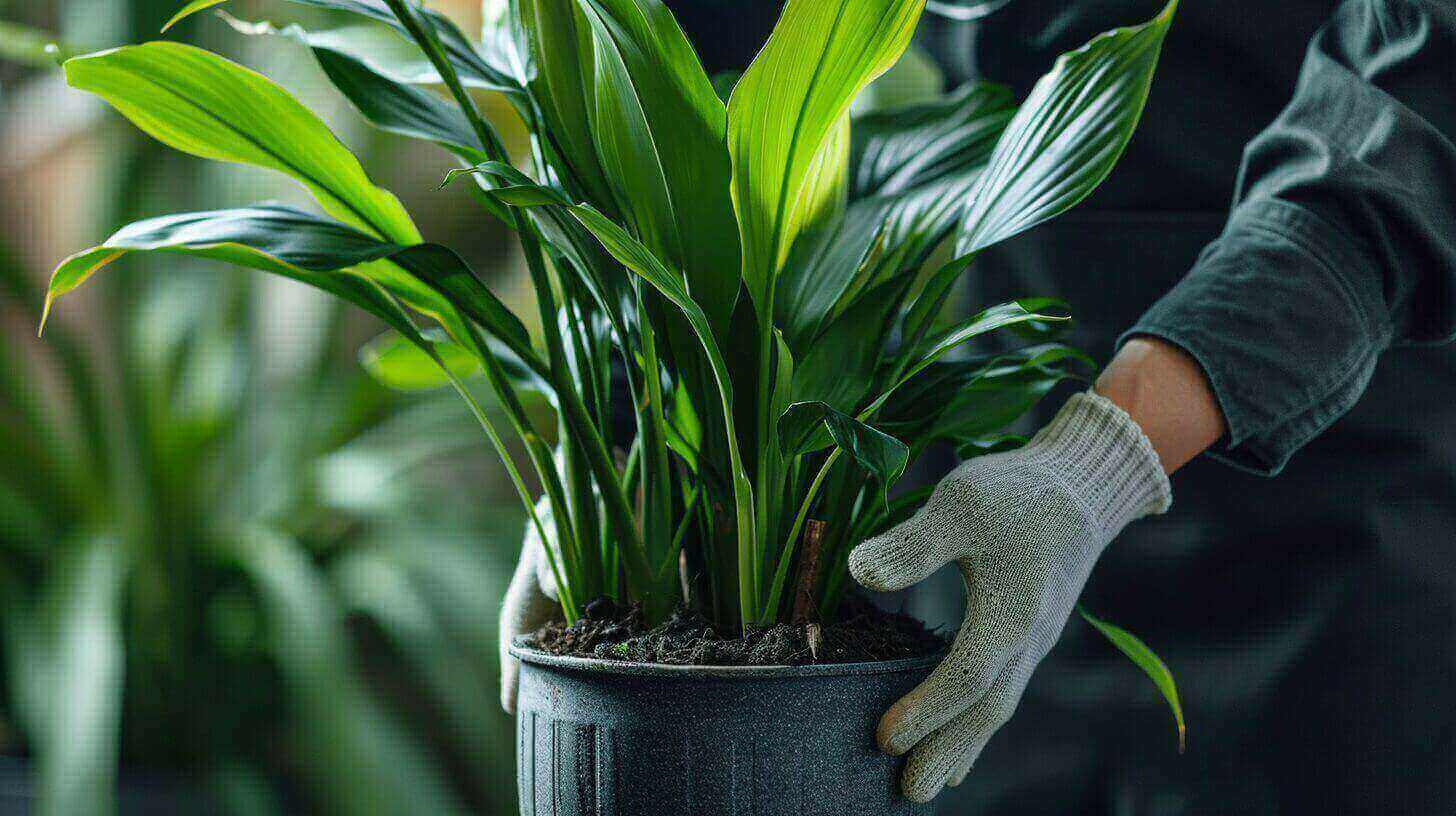
How to Transplant or Repot Cast Iron Houseplant
Preparing the plants for transplanting
Before transplanting your plants, it is important to prepare them properly to minimize stress and increase their chances of survival in their new environment. Here are some key steps to follow:
- Water the plants several hours (if possible) before transplanting: This will ensure that the plants are well-hydrated and their roots are hydrated before the transplant. Well-hydrated plants are more likely to withstand the shock of transplantation.
- Check the soil: Make sure the soil is moist but not overly wet. You don’t want the roots to be sitting in water, as this can lead to root rot. If the soil is too dry, water the plants a day or two before transplanting to allow the moisture to penetrate the roots.
- Prepare the new location: If you are transplanting the plants into a new pot, make sure it is clean and has drainage holes at the bottom. If you are transplanting them into the ground, ensure that the soil is well-prepared and free of weeds and debris.
Steps to transplanting correctly
- Dig a hole: Dig a hole in the new location that is slightly larger and deeper than the root ball of the plant. This will give the roots enough space to grow and establish themselves.
- Carefully remove the plant from its current container: Gently tap the sides of the container to loosen the root ball and carefully slide the plant out. If the plant is root-bound, you may need to gently tease the roots apart to encourage proper growth.
- Place the plant in the hole: Hold the plant by the root ball and lower it into the hole, making sure it is positioned at the same depth as it was in its original container. Avoid burying the stem too deep, as this can lead to rotting.
- Backfill the hole: Fill the hole around the plant with soil, gently firming it around the roots. Make sure there are no air pockets around the roots, as this can hinder their growth.
- Water the plant: After transplanting, give the plant a thorough watering to settle the soil around the roots and provide hydration. Water deeply but avoid overwatering, as this can lead to root rot.
- Monitor and care for the transplanted plant: Keep a close eye on the transplanted plant and provide it with the appropriate care, including regular watering, fertilization, and protection from extreme weather conditions. Be patient, as it may take some time for the plant to adjust to its new surroundings and show signs of growth.
Transplanting from Pot to Soil
Choosing the right day and time for transplanting
To ensure a successful transplant from pot to soil, it is important to choose the right day and time. Ideally, try to transplant on a warm overcast day in the early morning. This gives the plants a chance to settle into the soil without being instantly exposed to the intense midday sun. Transplanting in the early morning also allows the plants to have a full day to adjust before facing nighttime temperature drops.
Ensuring proper soil moisture and watering techniques
Before transplanting, it is crucial to check the soil moisture in both the pots and the soil where you plan to transplant. The soil should be moist but not soaking wet. If the soil feels too dry, water it deeply a day before working the soil to ensure it has enough moisture.
When transplanting, gently remove the plant from its pot by tapping the sides to loosen the root ball. If the roots are tightly bound, you may need to gently tease them apart to encourage proper growth. Dig a hole in the new location that is slightly larger and deeper than the root ball of the plant, providing enough space for the roots to grow and establish themselves.
Hold the plant by the root ball and lower it into the hole, making sure it is positioned at the same depth as it was in its original pot. Avoid burying the stem too deep, as this can lead to rotting. Fill the hole around the plant with soil, gently firming it around the roots to eliminate any air pockets that can hinder growth.
After transplanting, water the plant thoroughly to settle the soil around the roots and provide hydration. Water deeply but avoid overwatering, as this can lead to root rot. Monitor the transplanted plant closely and provide it with the appropriate care, including regular watering, fertilization, and protection from extreme weather conditions.
By transplanting on the right day and time, ensuring proper soil moisture, and following these steps, you can increase the chances of a successful transplant and give your plants the best opportunity to thrive in their new environment. Remember to handle the plants with care, water them adequately, and monitor their progress closely to ensure healthy and robust growth.
Transplanting Seedlings
Why transplanting seedlings is necessary
Transplanting seedlings, also known as potting up, is an essential step in the growing process. It involves moving young plants from their initial containers or trays into larger pots or directly into the soil. There are several reasons why transplanting seedlings is necessary. Firstly, it allows the plants to have more space for root growth, which is crucial for their overall health and development. When seedlings outgrow their initial containers, their roots become crowded and can become root-bound, leading to stunted growth and poor plant health. By transplanting, you provide them with the necessary room to expand their root systems and access sufficient water and nutrients.
Secondly, transplanting seedlings can help optimize plant density. When seedlings are initially sown, they are typically planted close together to maximize the use of space. However, as they grow, they need more space between them to prevent competition for resources such as sunlight, water, and nutrients. Transplanting seedlings allows you to adjust their spacing, promoting better air circulation and reducing the risk of disease and pest infestation. Additionally, transplanting improves overall plant health by reducing overcrowding and stress on the young plants.
Providing enough space for root growth
When transplanting seedlings, it is vital to provide them with enough space for their root systems to grow and establish themselves. This ensures their ability to access sufficient nutrients and water from the soil, leading to healthier plants. Here are the steps to follow for successful transplantation:
First, choose the right day and time for transplanting. Ideally, select a warm, overcast day in the early morning. This allows the plants to acclimate to their new environment before facing intense midday sun or temperature drops at night.
Next, ensure proper soil moisture. Check the moisture levels in both the pots and the soil where you plan to transplant. The soil should be moist but not overly saturated. If the soil is too dry, water it deeply the day before transplanting to ensure adequate moisture.
When transplanting, gently remove the plant from its initial container, tapping the sides to loosen the root ball. If the roots are tightly bound, gently tease them apart to encourage healthy growth. Dig a hole in the new location that is slightly larger and deeper than the root ball, providing ample space for the roots to spread out.
Hold the plant by the root ball and lower it into the hole, ensuring it is positioned at the same depth as it was in its original container. Avoid burying the stem too deep, as this can lead to rotting. Fill the hole with soil, gently firming it around the roots to eliminate any air pockets.
After transplanting, water the plant thoroughly to settle the soil around the roots and provide hydration. Water deeply but avoid overwatering, as this can cause root rot. Monitor the transplanted plants closely and provide them with regular care, including adequate watering, fertilization, and protection from extreme weather conditions.
FAQ
What pests can affect my cast-iron plant?
Spider mites can be a common pest for indoor plants including the cast-iron plant. Regularly check the foliage for any signs of these pests. If you notice small, discolored spots on the leaves, you may have an infestation. Treat the plant with insecticidal soap to eliminate the mites.
How does humidity affect the growth of my cast iron plant?
Cast iron plants prefer environments with higher humidity. However, they are hardy plants and can tolerate a range of humidity levels. If your indoor environment is dry, consider using a humidifier or placing the plant on a tray of pebbles filled with water to increase humidity.
How can I propagate my cast iron plant?
Propagation of the cast iron plant is typically done through division of the rhizome. This is best done in the spring or summer. Simply divide the plant at the base, ensuring each new plant has a healthy section of rhizome and foliage.
What are some tips for cast iron plant care?
Cast iron plants are low-maintenance and easy-care. They prefer indirect sunlight and can thrive in low-light conditions. Water your cast iron plant when the top inch of the potting soil is dry to the touch, but avoid soggy soil. Fertilize the plant during the spring and summer months for optimal growth.
How often should I fertilize my cast iron plant?
Fertilize your cast iron plant during the growing season (spring and summer). Use a balanced, slow-release fertilizer to provide the necessary nutrients. However, be careful not to over-fertilize as this can cause the plant to burn, leading to brown leaf tips.
How can I grow cast iron plants indoors?
Cast iron plants are excellent indoor plants due to their low-light requirements. They prefer indirect light and well-draining potting mix. Keep the soil slightly moist but not soggy. The plant thrives in a consistent environment, so try to avoid drastic temperature or humidity changes.
What is the ‘Variegata’ cultivar in cast iron plants?
The ‘Variegata’ is a cultivar of the cast iron plant known for its variegate, or multicolored, foliage. The leaves are dark green with streaks of creamy white, adding a unique aesthetic to your indoor plant collection. Like other cast iron plants, the ‘Variegata’ prefers indirect light and well-draining soil.
Do cast iron plants need direct sunlight?
No, cast iron plants prefer indirect sunlight or shade. Direct sun can scorch the plant’s leaves, causing them to turn brown. These plants are perfect for low-light conditions indoors, making them a popular choice for office spaces and homes with limited natural light.