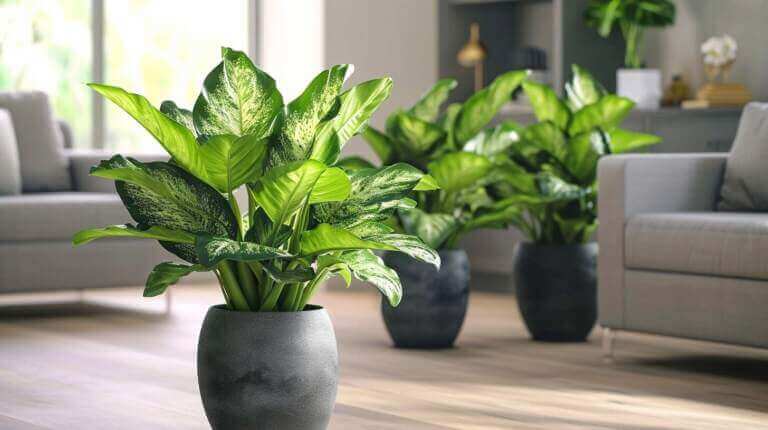
Repotting Polka Dot Plants: When to Transplant and How to Do It Right
The polka dot plant, scientifically known as Hypoestes phyllostachya, is a popular choice for indoor gardening enthusiasts. With its variegated leaves featuring bright colors and spots, it adds a touch of whimsy and charm to any space. However, as your polka dot plant continues to flourish, it may outgrow its current pot and require repotting.
Key Takeaways:
- Repot your polka dot plant every one to two years or when the roots become overcrowded.
- Choose a slightly larger pot with drainage holes for repotting.
- Use a well-draining potting mix and keep the soil moist after repotting.
- Provide warm and humid conditions for your polka dot plant.
- Feed your plant regularly with a balanced fertilizer.
Signs that your polka dot houseplants need repotting
Indications that your polka dot houseplants have outgrown their current containers
Polka dot houseplants, with their distinctive white spots on dark green leaves, can be a beautiful addition to any indoor space. However, like all plants, they require proper care and attention to thrive. One crucial aspect of their care is knowing when it is time to repot them.
The first indication that your polka dot houseplants need repotting is if you notice roots coming out of the drainage holes or circling around the edges of the container. This means that the plant has outgrown its current home and needs more space for its roots to grow.
Symptoms of root bound plants
Root-bound plants occur when the roots have filled the entire container, leaving no room for new growth. This can be detrimental to the plant’s health and overall growth. Here are some symptoms that indicate your polka dot houseplant may be root bound:
- Slow or stunted growth: If your polka dot houseplant is not growing as vigorously as before or has stopped growing altogether, it may be a sign of being root bound. The lack of space for new root growth can impede the plant’s ability to take in water and nutrients.
- Yellowing or wilting leaves: When a plant becomes root bound, its roots cannot efficiently absorb water, leading to water stress. As a result, the leaves may start wilting or turn yellow as the plant struggles to access the necessary moisture it needs to survive.
- Difficulty watering: If you find that no matter how much you water your polka dot houseplant, the water quickly runs out of the bottom drainage holes without soaking into the soil, it may be an indication that the roots have densely packed the container. The lack of space for the water to be absorbed can cause the excess to drain away rapidly.
Choosing the right time to repot
Factors to consider when determining the best time to repot polka dot houseplants
Repotting your polka dot houseplants is essential for their overall health and growth. However, it is crucial to choose the right time to ensure successful transplantation. Here are some factors to consider when determining the best time to repot your polka dot houseplants.
- Growth stage: It is best to repot your polka dot houseplants during their active growth phase. This is usually in the spring or early summer when the plants are actively producing new leaves and roots. Repotting during this period allows the plant to quickly adjust to its new environment and establish itself in the larger container.
- Root health: Inspect the root system of your polka dot houseplant before repotting. If you notice root rot, mushy roots, or excessive root circling, it is crucial to repot the plant immediately, regardless of the season. Unhealthy roots can hinder the absorption of water and nutrients, leading to poor plant health.
- Symptoms of being root bound: As mentioned in the previous section, look out for signs that your polka dot houseplant has outgrown its current container. If you notice roots coming out of the drainage holes, circling around the edges of the pot, or the plant becoming top-heavy and unstable, it is time to repot.
Seasonal considerations for repotting
While spring or early summer is generally the best time to repot polka dot houseplants, seasonal considerations can also come into play.
- Spring: The arrival of spring brings an increase in daylight hours and warmer temperatures, both of which promote new growth. Repotting your polka dot houseplants in spring allows them to take advantage of these favorable conditions and recover quickly from the transplant shock.
- Summer: If you missed the spring repotting window, summer can be another suitable time to repot your polka dot houseplants. However, it is essential to choose a preferably cooler day or time when the sun is not intense to minimize stress on the plant.
- Avoid repotting in winter: Winter is not an ideal time to repot your polka dot houseplants. The lower light levels and cooler temperatures during this season can slow down the plant’s growth and recovery process. It is best to wait until the arrival of spring to repot your plants.
Preparing for Repotting
When it comes to repotting your polka dot houseplants, proper preparation is key to ensuring a successful transplant. This involves gathering necessary materials and tools and creating an ideal potting mix. Here’s a closer look at each step:
Gathering Necessary Materials and Tools for Repotting
Before you begin the repotting process, it’s essential to have all the necessary materials and tools on hand. Here’s a list of items you’ll need:
- New pot: Choose a pot that is one size larger than the current container to allow for growth and root expansion.
- Potting soil: Opt for a well-draining potting mix specifically formulated for indoor plants. Avoid using garden soil, as it may contain pests, diseases, or weed seeds.
- Perlite or vermiculite: Adding perlite or vermiculite to the potting soil can improve drainage and aeration, preventing root rot.
- Watering can: Ensure you have a watering can with a narrow spout to control the water flow during and after repotting.
- Pruning shears or scissors: These will come in handy for trimming any dead or damaged roots and pruning the foliage if necessary.
- Gloves: Wearing gloves can protect your hands from any potential irritations or allergies caused by the potting mix.
- Newspaper or drop cloth: Lay down some newspaper or a drop cloth to catch any soil or debris during the repotting process, making cleanup easier.
- Plant labels: If you have multiple polka dot houseplants, labeling each pot can help you keep track of their specific care requirements.
Creating an Ideal Potting Mix for Polka Dot Houseplants
Now that you have gathered your materials and tools, it’s time to create an ideal potting mix for your polka dot houseplants. Follow these steps:
- Start with the potting soil: Fill the new pot about one-third full with the potting mix. Ensure the pot has drainage holes to prevent waterlogging.
- Add perlite or vermiculite: Mix in a handful of perlite or vermiculite to the potting soil to improve drainage and aeration.
- Moisten the potting mix: Before placing the plant in the new pot, slightly moisten the potting mix. This will help settle the soil and create a conducive environment for root growth.
- Remove the plant from its current container: Gently loosen the polka dot houseplant from its current pot, taking care not to damage the roots. If the plant is root-bound, carefully untangle the roots to encourage better growth.
- Position the plant in the new pot: Place the polka dot houseplant in the center of the new pot, ensuring it is at the same depth it was in the previous container. Adjust the potting mix underneath the plant to achieve the desired height.
- Add more potting mix: Fill the remaining space around the plant with the potting mix, gently firming it to provide support. Leave a small space between the top of the soil and the rim of the pot to allow for watering.
- Water the plant: Give the newly repotted polka dot houseplant a thorough watering, allowing excess water to drain out of the pot. This will help settle the soil and hydrate the roots.
How to Repot Polka Dot Houseplants
Step-by-step Guide to Properly Repotting Polka Dot Houseplants
Repotting your polka dot houseplants is an essential part of their care routine, as it allows them to grow and thrive in a larger container. Here is a step-by-step guide to help you properly repot your polka dot houseplants:
- Choose the right time: The best time to repot your polka dot houseplants is during the spring or early summer when they are actively growing. Avoid repotting them during the winter months when their growth slows down.
- Prepare the new pot: Select a pot that is one size larger than the current container. Make sure it has drainage holes to prevent waterlogging. Thoroughly clean the pot to remove any dirt or debris.
- Prepare the potting mix: Use a well-draining potting mix specifically formulated for indoor plants. You can also add perlite or vermiculite to improve drainage and aeration. Moisten the potting mix slightly before using it.
- Carefully remove the plant: Gently loosen the polka dot houseplant from its current pot by squeezing the sides or tapping the container. Be careful not to damage the roots. If the plant is root-bound, gently untangle the roots to promote healthy growth.
- Place the plant in the new pot: Position the polka dot houseplant in the center of the new pot, ensuring it is at the same depth it was in the previous container. Adjust the potting mix underneath the plant to achieve the desired height.
- Add more potting mix: Fill the space around the plant with the prepared potting mix, gently firming it to provide support. Leave a small space between the top of the soil and the rim of the pot to allow for watering.
- Water the plant: After repotting, give the polka dot houseplant a thorough watering to settle the soil and hydrate the roots. Allow the excess water to drain out of the pot.
- Place in appropriate light: After repotting, place the polka dot houseplant in a location where it receives bright but indirect light. Avoid placing it in direct sunlight, as it can scorch the leaves.
Ensuring Minimal Damage to the Plants During the Process
When repotting polka dot houseplants, it’s important to handle them with care to minimize any damage. Here are some tips to ensure minimal damage during the process:
- Be gentle: Handle the plant and its roots delicately to avoid breaking or damaging them. Use your hands or a trowel to loosen the plant from its current container.
- Trim any damaged roots: If you notice any damaged or diseased roots, trim them using clean pruning shears. This will promote healthy growth in the new pot.
- Support the plant: When placing the plant in the new pot, use your hand to support the base of the stems while filling in the potting mix. This will prevent the plant from shifting or tilting.
- Monitor watering: After repotting, be mindful of the watering needs of the polka dot houseplant. Avoid overwatering, as it can lead to root rot. Water the plant only when the top inch of soil feels dry.
Aftercare for Repotted Polka Dot Houseplants
Caring for Repotted Polka Dot Houseplants Post-Repotting
After successfully repotting your polka dot houseplants, it’s crucial to provide them with proper aftercare to ensure their health and well-being. Here are some essential tips to follow:
- Give them time to adjust: Repotting can be a stressful experience for plants, so it’s important to allow them time to adjust to their new environment. Avoid moving them around too much during the first few weeks after repotting, as this can disrupt their root growth.
- Monitor for signs of stress: Keep an eye out for any signs of stress in your repotted polka dot houseplants. This can include wilting leaves, discoloration, or stunted growth. If you notice any of these signs, adjust your care routine accordingly.
- Continue regular watering: In the days following repotting, it’s important to maintain a consistent watering routine for your polka dot houseplants. Water them when the top inch of soil feels dry, ensuring that the water reaches the roots. Avoid overwatering, as it can lead to root rot.
- Provide proper humidity: Polka dot houseplants thrive in a humid environment. To increase humidity levels, you can place a tray of water near the plants or use a humidifier. Mist the leaves occasionally to keep them moist.
- Prune if necessary: If your polka dot houseplants have undergone any damage or have overgrown during the repotting process, you can prune them to encourage new growth. Use clean pruning shears to remove any dead or diseased leaves or stems.
Watering, Light, and Temperature Requirements
Proper watering, light, and temperature conditions are vital for the well-being of your repotted polka dot houseplants. Here’s what you need to know:
- Watering: As mentioned earlier, it’s important to water your polka dot houseplants when the top inch of soil feels dry. Ensure that the excess water can drain out of the pot to prevent waterlogging, as it can cause root rot. Avoid letting the plant sit in standing water.
- Light: Polka dot houseplants thrive in bright but indirect light. Place them in a location where they receive bright, filtered light for a few hours each day. Avoid placing them in direct sunlight, as it can scorch the leaves and cause damage.
- Temperature: Polka dot houseplants prefer temperatures between 60-75°F (15-24°C). They are sensitive to cold drafts, so avoid placing them near windows or doors that can expose them to chilly temperatures.
FAQ
When should I repot my polka dot houseplants?
You should repot your polka dot plants when you notice that the roots are becoming crowded in the current pot or when the plant has outgrown its container.
How should I repot my polka dot plant?
To repot your polka dot plant, gently remove it from its current pot, loosen the roots, and place it in a slightly larger container with fresh potting soil. Be sure to water the plant thoroughly after repotting to help it adjust.
What are common pests and diseases of the polka dot plant?
A4: Common pests and plant diseases for polka dot plants include aphids, spider mites, and root rot. Regularly check your plant for signs of these and take action if necessary.
How do I manage humidity for my polka dot plant?
As a tropical plant, the polka dot plant prefers high humidity. You can maintain humidity by misting the plant or using a humidifier.
What are some common problems with growing polka dot plants indoors?
When growing a polka dot plant indoors, you may encounter a few problems. The plant can become leggy if it doesn’t get enough light. Also, overwatering can lead to root rot.
How do I repot a polka dot plant?
To repot a polka dot plant, choose a pot that’s slightly larger than the current one. Gently remove the plant from its current pot, place it in the new one, and fill with potting soil.
How do polka dot plants behave in different seasons?
Polka dot plants have a growing season in spring and summer. During this time, they’ll grow rapidly and may need more frequent watering. In fall and winter, they enter a dormant phase where growth slows.