Spider plants are well-known for their ability to produce numerous baby spider plant offspring, known as ‘pups,’ that eventually need to be repotted for optimal growth. In this comprehensive guide, we will explore the process of repotting spider plant babies, from identifying the pups to providing the necessary aftercare.
By following our step-by-step instructions and gathering the right tools and materials, you can ensure the successful transplantation of these vibrant green additions to your home or office.
Key Takeaways
- Spider plant pups are offshoots that grow from the base of the mother plant and can be separated and repotted to grow new plants.
- Repotting should be done in the spring or summer when the plant is actively growing and avoid repotting during the winter when the plant is dormant.
- Choose a pot slightly larger than the current one with drainage holes and use a well-draining potting mix rich in organic matter.
- After repotting, establish a regular watering routine, provide bright, indirect light, and avoid exposing the pups to harsh, direct sunlight.
Identifying Spider Plant Pups: Understanding the Spiderettes Growth Process
How do spider plant pups grow and develop?
Spider plant pup care is essential to ensure healthy growth and development. Spider plant pups are offshoots that grow from the base of the mother plant. These pups are miniature versions of the parent plant and can be separated and repotted to grow new plants.
When repotting spider plant pups, it is important to avoid common mistakes that can hinder their growth. One common mistake is repotting the pups too early when they are still too small and fragile. Another mistake is using a pot that is too big, which can lead to overwatering and root rot. It is crucial to provide the pups with a well-draining potting mix and water them sparingly to promote healthy root development.
Knowing when to repot spider plant pups is essential for their overall well-being. Now, let’s discuss the signs and timing of repotting spider plant pups.
When to Repot Spider Plant Babies: Signs and Timing
Ideally, it is crucial to carefully observe the signs and consider the appropriate timing for repotting spider plant pups. The timing of repotting spider plant pups can vary depending on the season. Spring and summer are generally the best seasons for repotting, as the plant is actively growing during this time and will recover quickly from the stress of repotting. However, if the plant becomes root-bound or starts to show signs of distress, such as wilting or yellowing leaves, repotting should be done regardless of the season.
On the other hand, it is important to avoid repotting during the winter months when the plant is in its dormant phase. Common mistakes to avoid when repotting spider plant pups include using a pot that is too large, overwatering, and not providing enough sunlight. It is essential to consider the specific needs of the plant and provide the appropriate care during the repotting process.
Transitioning to the next section, gathering the right supplies, such as tools and materials, will ensure a successful repotting experience.
Gathering the Right Supplies: Tools and Materials for Repotting
When preparing to repot spider plant pups, it is important to gather the necessary tools and materials for the task. Choosing the right size pot is crucial in finding the perfect home for your spider plant pups. Opt for a pot that is slightly larger than the current one, allowing room for growth while also providing stability.
Selecting the right soil is equally important to ensure optimal growth for repotted spider plant pups. Use a well-draining potting mix that is rich in organic matter, such as a mixture of peat moss, perlite, and vermiculite. This will provide the necessary nutrients and moisture retention while preventing waterlogged roots.
With the right pot and soil, your spider plant pups will thrive and flourish. Now, let’s move on to the step-by-step guide to repotting spider plant pups.
Step-by-Step Guide to Repotting Spider Plant Pups
To successfully repot spider plant pups, you will need to follow a step-by-step guide.
Here is a simple and effective process to ensure the health and vitality of your spider plant babies:
- Prepare the new pot: Choose a pot that is slightly larger than the current one, with drainage holes at the bottom. Fill it with well-draining potting soil.
- Gently remove the pup: Carefully separate the pup from the parent plant, ensuring that it has a good root system. Be cautious not to damage the roots during this process.
- Plant the pup: Place the pup in the new pot, making sure the roots are covered with soil. Lightly press the soil around the base to secure the pup.
Common mistakes to avoid when repotting spider plant pups:
- Overwatering: Spider plants prefer slightly moist soil, so avoid overwatering as it can lead to root rot.
- Using the wrong soil: Choose a well-draining potting mix to prevent waterlogged roots.
- Placing in direct sunlight: Spider plants thrive in bright, indirect light, so avoid exposing them to harsh, direct sunlight.
Creative ways to display repotted spider plant pups in your home:
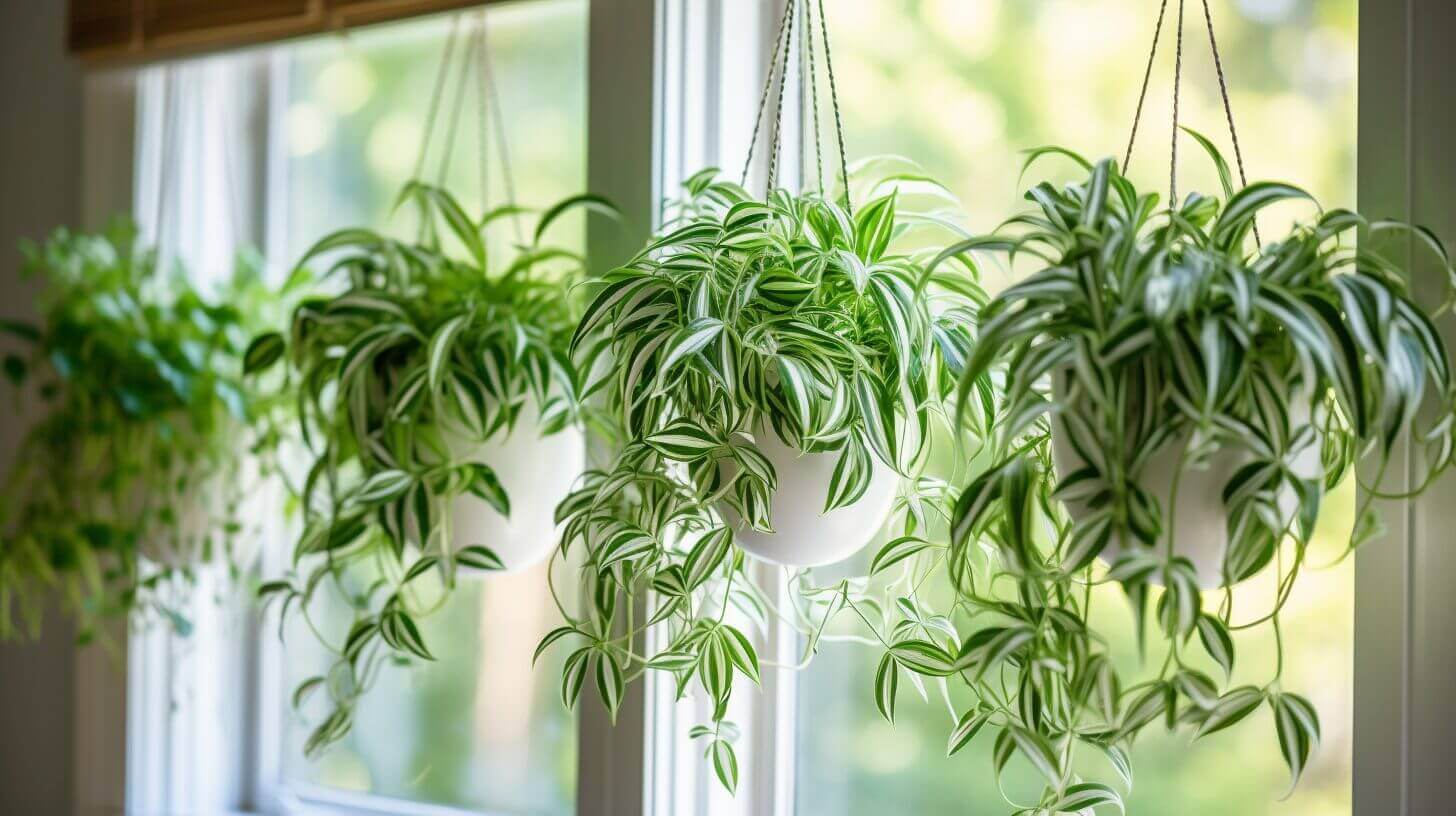
- Hanging baskets: Hang the repotted pups in decorative baskets, allowing their cascading foliage to add beauty to your living space.
- Wall-mounted planters: Attach small pots to a wall or create a vertical garden using repotted spider plant pups.
- Terrariums: Create miniature indoor gardens by placing the pups in glass containers or terrariums, adding a touch of greenery to any room.
Aftercare Tips for Newly Repotted Spider Plant Pups
Implementing proper care practices is essential for ensuring the healthy growth and development of newly repotted spider plant pups. After repotting, it is important to establish a regular watering routine. Spider plant pups should be watered thoroughly, allowing the soil to become slightly dry between each watering. This typically translates to watering once every 1-2 weeks, depending on the environmental conditions.
When it comes to sunlight requirements, spider plant pups thrive in bright, indirect light. Placing them near a north or east-facing window is ideal as it provides the right amount of light without the risk of scorching the leaves. However, they can also tolerate lower light conditions, making them versatile and adaptable to different environments.
Frequently Asked Questions
Can I Repot Spider Plant Pups Directly Into a Larger Pot or Should I Gradually Increase Their Pot Size?
When repotting spider plant pups, there are two approaches: directly repotting them into a larger pot or gradually increasing their pot size.
While both methods can be successful, there are benefits to repotting pups right away. Directly repotting into a larger pot allows the plant to have more space for growth and development. It also reduces the risk of root-bound plants and promotes better overall plant health.
Gradually increasing pot size may be suitable for those who prefer a more cautious approach.
How Often Should I Water Newly Repotted Spider Plant Pups?
When it comes to caring for newly repotted spider plant pups, it is important to establish a proper watering routine. The frequency of watering will depend on various factors such as the growth rate, pot size, and environmental conditions.
It is recommended to water the plants thoroughly, allowing the water to fully penetrate the soil, but also ensuring that excess water drains out. It is crucial to strike a balance between providing enough moisture for the plants’ needs without overwatering, as this can lead to root rot.
Can Spider Plant Pups Be Propagated in Water Instead of Soil?
Water propagation for spider plant pups is a viable alternative to repotting them in soil. This method involves placing the pups in water until they develop roots, which can then be transferred to soil.
There are several benefits to water propagation, including the ability to closely monitor root development and prevent overwatering. Additionally, water propagation allows for easy observation of any potential issues or diseases.
However, it is important to ensure that the water is changed regularly to maintain optimal conditions for the pups’ growth.
Can I Use the Same Repotting Method for Spider Plant Pups as I Would for Propagating from a Cutting?
Spider plant pups, those adorable miniature versions of their parent plants, have captivated the hearts of many plant enthusiasts. Among the questions frequently asked is the duration it takes for these pups to begin producing their own offspring.
The growth rate of spider plant pups can vary and depend on factors such as optimal potting conditions, light exposure, and care. With proper nurturing, it typically takes several months for spider plant pups to mature and start producing their own pups, continuing the cycle of life for these resilient plants.
Can Spider Plant Pups Be Repotted During the Winter Months or Is It Better to Wait Until Spring?
During the winter months, it is generally recommended to wait until spring to repot spider plant pups. This is because the winter season can be harsh on plants and may hinder their ability to establish new roots. Repotting during spring, when the weather is warmer and more favorable for growth, allows the pups to adapt and thrive more easily.
However, if the current pot is too crowded or the plant is showing signs of distress, repotting during winter with proper care and protection can be considered.

