Reasons Why Your Elephant Ear Leaves Are Turning Yellow?
Have you noticed that your elephant ear plant’s leaves are turning yellow? As a tropical plant enthusiast, it can be concerning to see your prized foliage lose its vibrant green hue. But fear not! In this article, I will explore the various reasons why your elephant ear plant may be experiencing this yellowing phenomenon and provide you with valuable tips to keep your green thumb in check.
Key Takeaways:
- Yellowing leaves in elephant ear plants can be a natural part of their life cycle, especially during seasonal changes.
- Temperature and sunlight play a vital role in the health of your plant, so it’s essential to provide the right conditions.
- Proper watering practices, including avoiding over-watering or under-watering, can help prevent yellow spots on the leaves.
- The soil conditions, such as pH levels and nutrient deficiency, can also contribute to yellowing leaves.
- Pest infestations and diseases can cause yellowing, so regular maintenance and control methods are necessary.
Natural Life Cycle of Elephant Ear Plants
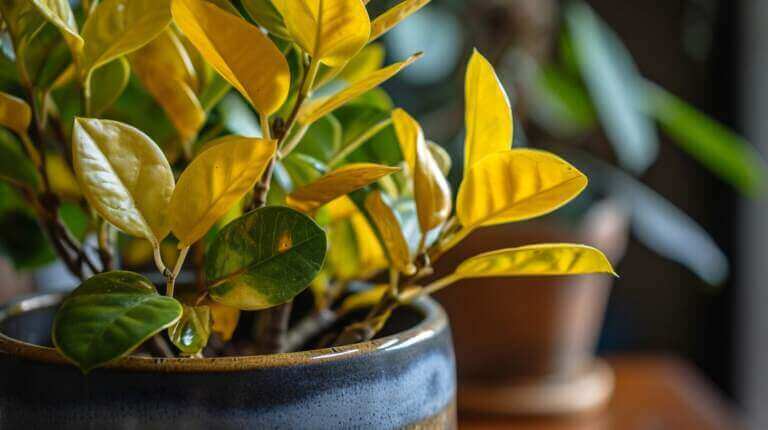
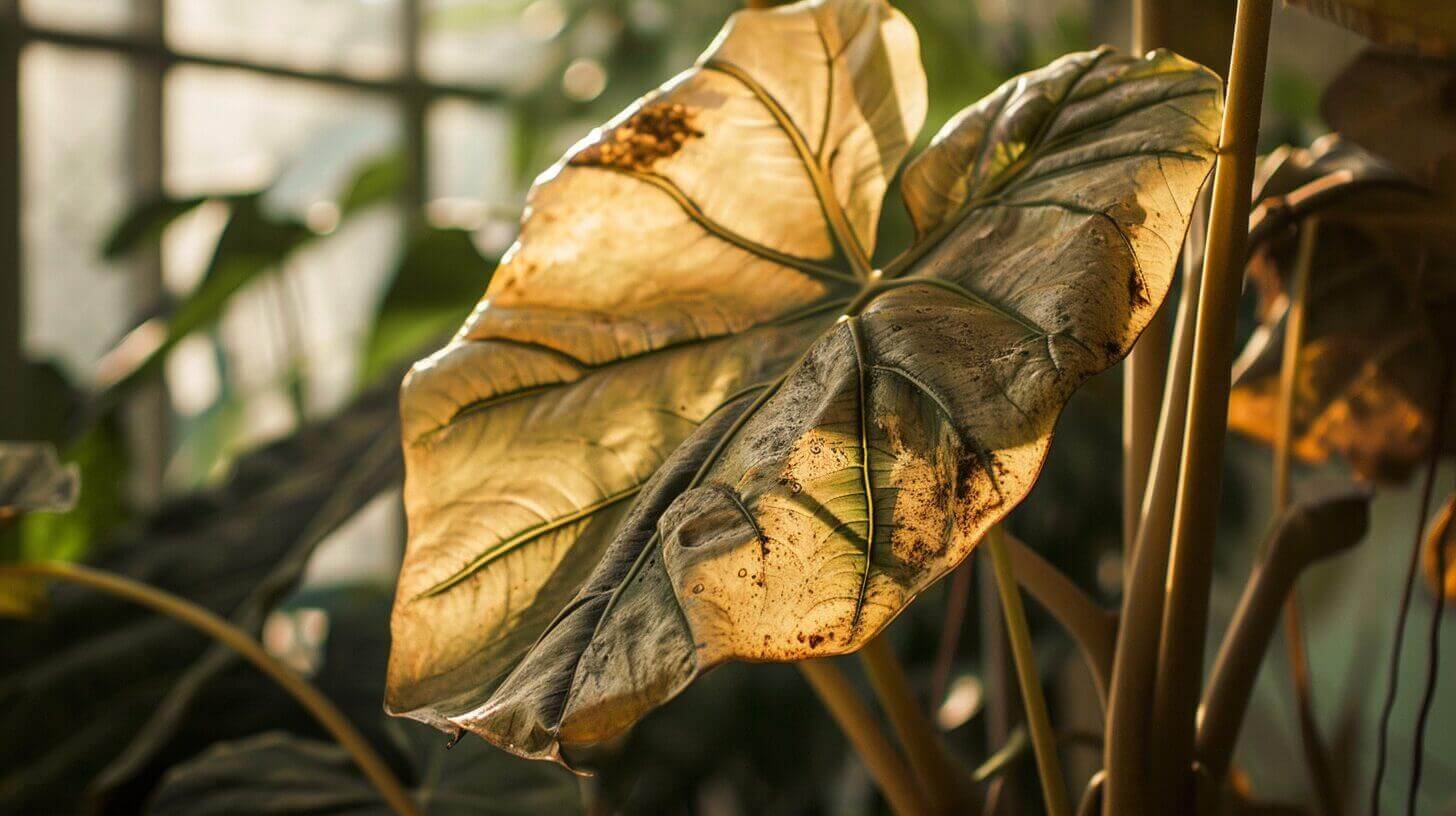
Like all plants, elephant ear plants have a natural life cycle. As the plant ages, its older leaves may turn yellow and eventually shed. This is a normal process, particularly during the changing of seasons and when the plant goes into dormancy. To make room for new growth in the springtime, it is recommended to cut back the yellowing leaves. Larger-leaved plants, such as elephant ears, tend to go yellow in late autumn. Understanding this natural life cycle can provide peace of mind, and ensuring the plant has the right temperature as it goes dormant can make a difference when it regrows in spring.
When the changing seasons bring cooler temperatures, elephant ear plants prepare for dormancy. During this time, the plant conserves energy and sheds its older leaves. This shedding is a natural part of the plant’s life cycle and allows it to focus on new growth in the upcoming season. By cutting back the yellowing leaves, you help the plant redirect its resources to support the development of new leaves. This pruning step also helps maintain the overall appearance and health of the plant.
It’s essential to understand that the yellowing of older leaves is a natural occurrence. However, if you notice excessive yellowing or yellowing on new leaves, it may be a sign of other issues, such as pests or nutrient deficiencies. Monitoring your plant’s overall health and addressing any problems promptly can help ensure its longevity and vibrancy.
| Season | Plant Appearance |
|---|---|
| Spring and Summer | Lush green foliage |
| Late Autumn | Yellowing of older leaves |
| Winter | Dormancy, shedding of yellow leaves |
| Spring | New growth with vibrant green leaves |
Understanding the natural life cycle of your elephant ear plant can help you differentiate between normal leaf yellowing and signs of potential issues. By providing the right care during dormancy and ensuring optimal conditions for new growth, you can enjoy the beauty of your elephant ear plant all year round.
Elephant Ear Leaves Turn Yellow(Temperature and Sunlight Issues)
Temperature and sunlight play a vital role in the health of your elephant ear plant. Cold temperatures can cause the leaves to turn yellow, especially when exposed to drafts or direct cold air. It’s important to protect your plant from chilly breezes and provide warmth indoors if necessary. Elephant ears thrive in temperatures between 70 to 85 degrees Fahrenheit.
On the other hand, inadequate sunlight or too much shade can also lead to yellowing leaves. These tropical plants require bright, indirect sunlight and partial shade. Exposing them to excessive shade or insufficient sunlight can cause yellowing, particularly in the lower leaves. Finding the right balance between temperature and sunlight is key to maintaining the vibrant green foliage of your elephant ear plant.
To ensure your plant receives adequate sunlight, place it in an area with filtered light or provide shade during the hottest part of the day. If your elephant ear plant is growing indoors, consider using artificial grow lights to supplement sunlight. By creating the ideal temperature and sunlight conditions, you can keep your plant thriving and avoid yellowing leaves.
Providing the Right Conditions
Creating the right environment for your elephant ear plant is crucial for its overall health. Here are a few tips to ensure optimal temperature and sunlight conditions:
- Protect the plant from cold drafts and direct cold air
- Maintain temperatures between 70 to 85 degrees Fahrenheit
- Place the plant in an area with filtered light
- Provide partial shade during the hottest part of the day
- Consider using artificial grow lights for indoor plants
By following these recommendations, you can prevent yellowing leaves caused by temperature and sunlight issues and enjoy a thriving elephant ear plant.
Yellow Elephant Ear Leaves (Watering Practices)
Proper watering is crucial for maintaining the health and vibrancy of your elephant ear plant. Incorrect watering practices, such as over-watering or under-watering, can result in yellow spots on the leaves and insufficient water absorption. To ensure you are watering your plant correctly, follow these guidelines:
- Check the soil moisture: Use the finger test by inserting your finger a few inches into the soil. If it feels dry, it’s time to water the plant. If the soil is still moist, wait a few days before watering again.
- Watering frequency: Elephant ear plants typically require around 2 to 3 inches of water per week. This can vary based on factors like temperature, humidity, and the size of the plant.
When watering your elephant ear plant, remember to water thoroughly, allowing the water to penetrate the roots. Avoid over-watering, as it can suffocate the plant and hinder nutrient absorption. Additionally, under-watering can lead to the plant’s inability to access necessary nutrients.
By following these watering guidelines and paying attention to your plant’s moisture needs, you can help prevent yellowing leaves and promote the overall health of your elephant ear plant.
| Signs of Over-Watering | Signs of Under-Watering |
|---|---|
| – Yellowing leaves | – Wilting leaves |
| – Mushy or rotting roots | – Dry, crispy leaves |
| – Foul odor from the soil | – Soil pulling away from the edges of the pot |
Yellow Leaves On Elephant Ear (Soil Conditions and Nutrient Deficiency)
Proper soil conditions and nutrient availability are crucial for the health of your elephant ear plant. These tropical plants thrive in porous and well-draining soil that allows for proper moisture control. It is recommended to use a mix of peat moss, perlite, and sand to create a soil mixture that provides adequate drainage. This ensures that water does not accumulate around the plant’s roots, which can lead to root rot and yellowing leaves.
The soil pH also plays a significant role in the plant’s overall health. Elephant ear plants prefer acidic soil with a pH ranging from 5.5 to 6.5. If the soil pH is too high (alkaline), it can hinder nutrient availability and cause yellowing or browning leaves. Regularly testing and adjusting the soil pH can help maintain the optimal conditions for your plant.
| Soil Conditions | Recommendations |
|---|---|
| Porous and well-draining soil | Use a mix of peat moss, perlite, and sand |
| Acidic soil (pH 5.5 to 6.5) | Test soil pH regularly and adjust if necessary |
| Organic matter | Enrich soil with compost or organic fertilizers |
Organic matter in the soil is essential for providing the necessary nutrients for your elephant ear plant. Adding compost or organic fertilizers can help replenish essential minerals and improve overall soil fertility. Lack of nutrition can lead to yellowing leaves, so it’s important to ensure that the soil is adequately nourished.
If you notice yellowing leaves with green veins, it may indicate a nutrient deficiency, such as iron or magnesium. Fertilization is necessary in such cases to provide the plant with the required nutrients. Using a balanced fertilizer with appropriate ratios, such as 10-10-10 or 20-20-20, can supply the necessary nutrients and prevent further yellowing. Follow the fertilization instructions on the packaging to avoid over-fertilization, which can be harmful to the plant.
Elephant Ear Plant Leaves Turn Yellow (Pest and Disease Control)
Dealing with pests and diseases is crucial for maintaining the health and vitality of your elephant ear plant. Pests such as aphids, spider mites, and mealybugs can cause damage to the leaves, resulting in yellowing and overall decline. Additionally, environmental stressors can also contribute to the yellowing of the leaves.
To control pests, you can opt for organic or chemical methods. Organic methods include using insecticidal soaps or neem oil to deter and eliminate pests. These options are safer for the environment and do not harm beneficial insects. Chemical methods, on the other hand, involve using pesticides specifically designed to target the pests affecting your plant.
It’s important to closely monitor your plant for any signs of infestation and take immediate action. Regularly inspect the leaves, stems, and undersides of the leaves for pests or eggs. If you notice any, isolate the affected plant to prevent the spread of pests to other nearby plants.
Aside from pests, diseases can also affect your elephant ear plant. Common diseases include leaf spot, root rot, and fungal infections. These diseases often manifest as yellow or brown spots on the leaves. To prevent the occurrence of diseases, ensure that the plant is not over-watered and provide adequate air circulation. If a disease is present, remove and destroy any affected leaves to limit the spread.
Pruning and Maintenance
Regular pruning is an essential aspect of caring for your elephant ear plant. It helps maintain the plant’s shape, promotes new growth, and keeps the foliage looking lush and healthy. One common issue that can be resolved through pruning is drooping leaves. If you notice any leaves that are sagging or dragging on the ground, it’s a good idea to trim them off at the stem. This will not only improve the plant’s appearance but also redirect its energy towards producing new leaves.
Another reason for pruning is to remove yellowing or brown leaves. These discolored leaves can be a sign of nutrient deficiencies or other underlying issues. By removing the affected leaves, you encourage the plant to focus on developing fresh, vibrant foliage.
When pruning your elephant ear plant, it’s important to use clean and disinfected tools. This helps prevent the spread of any diseases or pests. Before making any cuts, wipe down your pruning shears or scissors with rubbing alcohol. This simple step can protect the health of your plant and ensure successful pruning.
| Pruning Tips for Elephant Ear Plants |
|---|
| Trim drooping or dragging leaves at the stem to maintain the plant’s shape. |
| Remove yellowing or brown leaves to promote new growth and prevent the spread of disease. |
| Disinfect pruning tools with rubbing alcohol before making any cuts to avoid introducing pathogens. |
Pruning your elephant ear plant is an opportunity to care for it and ensure its overall health and vitality. By following proper pruning techniques and maintaining regular maintenance, you can enjoy a thriving and visually appealing plant in your space.
Caring for Elephant Ears in Containers and Overwintering
If you’re planning to grow elephant ear plants in containers, there are a few things to keep in mind to ensure their health and vitality. Choose a large container that provides ample space for the plant’s roots to spread. This will help prevent the plant from becoming root-bound and enhance its overall growth. Additionally, select a container with proper drainage to avoid waterlogging the plant, which can lead to root rot.
When planting in pots, it’s important to use well-draining soil. This will allow excess water to flow through easily, preventing waterlogged conditions. You can create well-draining soil by mixing regular potting soil with perlite or coarse sand. This mixture will provide the right balance of moisture retention and drainage.
Regular fertilization is essential to maintain the health and vigor of your container-grown elephant ear plant. Fertilize the plant every two to four weeks during the growing season, using a balanced fertilizer. This will provide the necessary nutrients for robust growth and vibrant foliage. Always follow the fertilizer manufacturer’s instructions for application rates and frequency.
In colder climates, overwintering is crucial to protect the plant from frost and freezing temperatures. You can choose to store the tubers indoors or in a cool, dry place. If storing indoors, ensure that the plant receives sufficient warmth and humidity. Consider misting the foliage or using a humidifier to maintain the required moisture levels. If storing the tubers, clean them properly, remove any dead foliage, and place them in a breathable container with a layer of peat moss or vermiculite to prevent drying out.
FAQ
Why are the leaves of my elephant ear plant turning yellow?
There are several reasons why the leaves of your elephant ear plant may be turning yellow. It could be a natural part of the plant’s life cycle, a result of temperature or sunlight issues, improper watering practices, soil conditions or nutrient deficiency, pest infestations or diseases, or the need for pruning and maintenance.
Is it normal for the leaves of an elephant ear plant to turn yellow and shed?
Yes, it is normal for the older leaves of an elephant ear plant to turn yellow and eventually shed. This is particularly common during the changing of seasons and when the plant goes into dormancy. To make room for new growth in the springtime, it is recommended to cut back the yellowing leaves.
What temperature and sunlight conditions are ideal for an elephant ear plant?
Elephant ear plants prefer temperatures between 70 to 85 degrees Fahrenheit. They thrive in bright, indirect sunlight and partial shade. Cold temperatures, exposure to drafts or direct cold air, excessive shade, or inadequate sunlight can all lead to yellowing leaves.
How often should I water my elephant ear plant?
Proper watering is essential for the health of your elephant ear plant. It typically requires around 2 to 3 inches of water per week. To determine if your plant needs watering, perform a finger test by inserting your finger a few inches into the soil. Water the plant if the soil feels dry, and allow any excess water to collect in a dish beneath the pot. If the soil is still moist, wait a few days before watering again.
What type of soil and nutrients does an elephant ear plant need?
Elephant ears thrive in porous and well-draining soil with a pH ranging from 5.5 to 6.5. Higher pH levels can negatively impact nutrient availability and lead to yellowing or browning leaves. Enriching the soil with organic matter, such as compost, can provide the necessary nutrients. If leaves exhibit yellowing with green veins, fertilization with a balanced fertilizer, such as 10-10-10 or 20-20-20, is recommended.
How can I control pests and diseases that affect my elephant ear plant?
Common pests that affect elephant ear plants include aphids, spider mites, and mealybugs. Identifying and addressing these pests is crucial in preventing yellowing leaves. Both organic and chemical control methods can be used. Environmental stressors, such as drafts or changes in humidity, can also contribute to yellowing. Creating a favorable environment, including appropriate humidity levels and protection from drafts, can help alleviate stress and maintain plant health.
How should I prune and maintain my elephant ear plant?
Regular pruning is essential to maintain the shape of your elephant ear plant and promote new growth. Drooping leaves and yellowing or brown leaves can be pruned by cutting them off at the stem. It is important to disinfect pruning tools between cuts to prevent the spread of disease.
Can I grow an elephant ear plant in a container, and how do I care for it during winter?
Yes, elephant ear plants can thrive in containers. When planting in pots, choose a large container with proper drainage and well-draining soil. Fertilize regularly based on the plant’s needs. In colder climates, you can protect the plant during winter by storing the tubers in a cool, dry place or bringing the container plant indoors. Maintaining warm and humid conditions is essential for the plant’s health.